Tuesday, July 16, 2013

Veggie Thai Red Curry


This Thai curry has been a recent favorite at my place. We both are loving this, made quite often, with varying veggies, mushrooms, tofu etc. Thai cuisine is a close cousin of Indian cousin, with many spices used in common. Also use of coconut milk makes it especially closer to the South Indian cuisine. Eaten with sticky Jasmine rice or any other cooked ice, it makes a wholesome meal.

However, the combination of spices along with some not used in Indian curried and the method of cooking makes it quite different in taste from Indian curries. Most of the Thai curries are generally not vegetarian. And even the veggie ones often contain fish sauce, shrimp paste, making me hesitant to try one at restaurants.


So searching for recipes and experimenting on combinations, this is the one I have come up with and have stuck with it for quite sometime. We're happy with the taste of this customized, vegetarian home made Thai red curry. Here it is....

Veggie Thai Red Curry

Ingredients:
Coconut milk - 1 can
Bell pepper / capsicum - Chopped, 1 cup, a mix of red, green, yellow
French beans - a handful (optional)
Sugar snap peas - a handful
Baby corn - a handful
Firm Tofu - 200g, washed and drained, chopped into bite sized pieces
Eggplant - chopped (optional - i don't use it as i don't like it)
Carrot - 1, chopped (my addition)
Mushrooms - 1/2 cup, halved
Thai basil leaves - a handful
Soy sauce - 1 Tbsp
Sesame / any other oil - 2 Tbsp
Salt to taste - abt 1 tsp
Red curry paste

Red curry paste:
Dry red chilies - 3-4 (vary according to your spice tolerance)
Cumin- 1/2 tsp
Coriander seeds - 1/2 tsp
Cinnamon - 1/2 inch stick
Kafir lime leaves / bay leaves - 1-2
Fresh coriander leaves/stalks - chopped, a fistful
Brown sugar - 1/2 to 1 Tbsp
Fresh lemongrass - 2-3 Tbsp. minced
Shallots / red onion - 1/4 cup, sliced
Garlic - 2-3 cloves
Galangal / ginger 1 inch piece, grated
Black Pepper - 1/2 tsp
Lime / lemon zest - 1/2 tsp
Tomato ketchup / tomato puree - 2 Tbsp (optional)
Fresh lime juice - 2 Tbsp

Method:
For the paste:

  • Boil 1/4 cup water and turn off the heat. To this, add the dry red chilies and let them sit for 5-10 min.
  • After it is cool enough to handle, grind the soaked chilies with the rest of the ingredients for curry paste into a smooth mixture.
  • This is the Thai red curry paste. This can be made ahead the previous day and stored in the refrigerator.

For the curry:

  • Heat a heavy bottomed pan and add half the oil.
  • Optionally marinate the tofu pieces in some soy sauce, salt and pepper powder
  • Shallow fry the tofu in this till the raw smell is gone, sprinkle some salt if not marinated and keep aside. 
  • In the same pan, add the remaining oil and fry the red curry paste prepared, on low flame
  • Once the oil starts separating from the mixture, add the coconut milk, salt and bring to a boil
  • Meanwhile add the chopped vegetables, mushrooms and let cook in the coconut milk curry
  • Mix in the fried tofu as well and boil for a few minutes
  • Add soy sauce and basil leaves
  • Make sure the veggies are still crunchy and just cooked. Overcooking makes the veggies soggy.
  • Serve hot with some piping hot jasmine rice and enjoy!

Notes:

  • Some of the ingredients mentioned in the list may not be easily available in an Indian kitchen - like galangal, kafir lime etc. These I usually substitute with the mentioned alternative ingredients like normal ginger, bay leaves, etc. I don't see much of a difference.
  • I add vegetables of my choice to this curry usually and do not always stick to the original Thai veggies.


Wednesday, June 26, 2013

Coffee Walnut Cookies


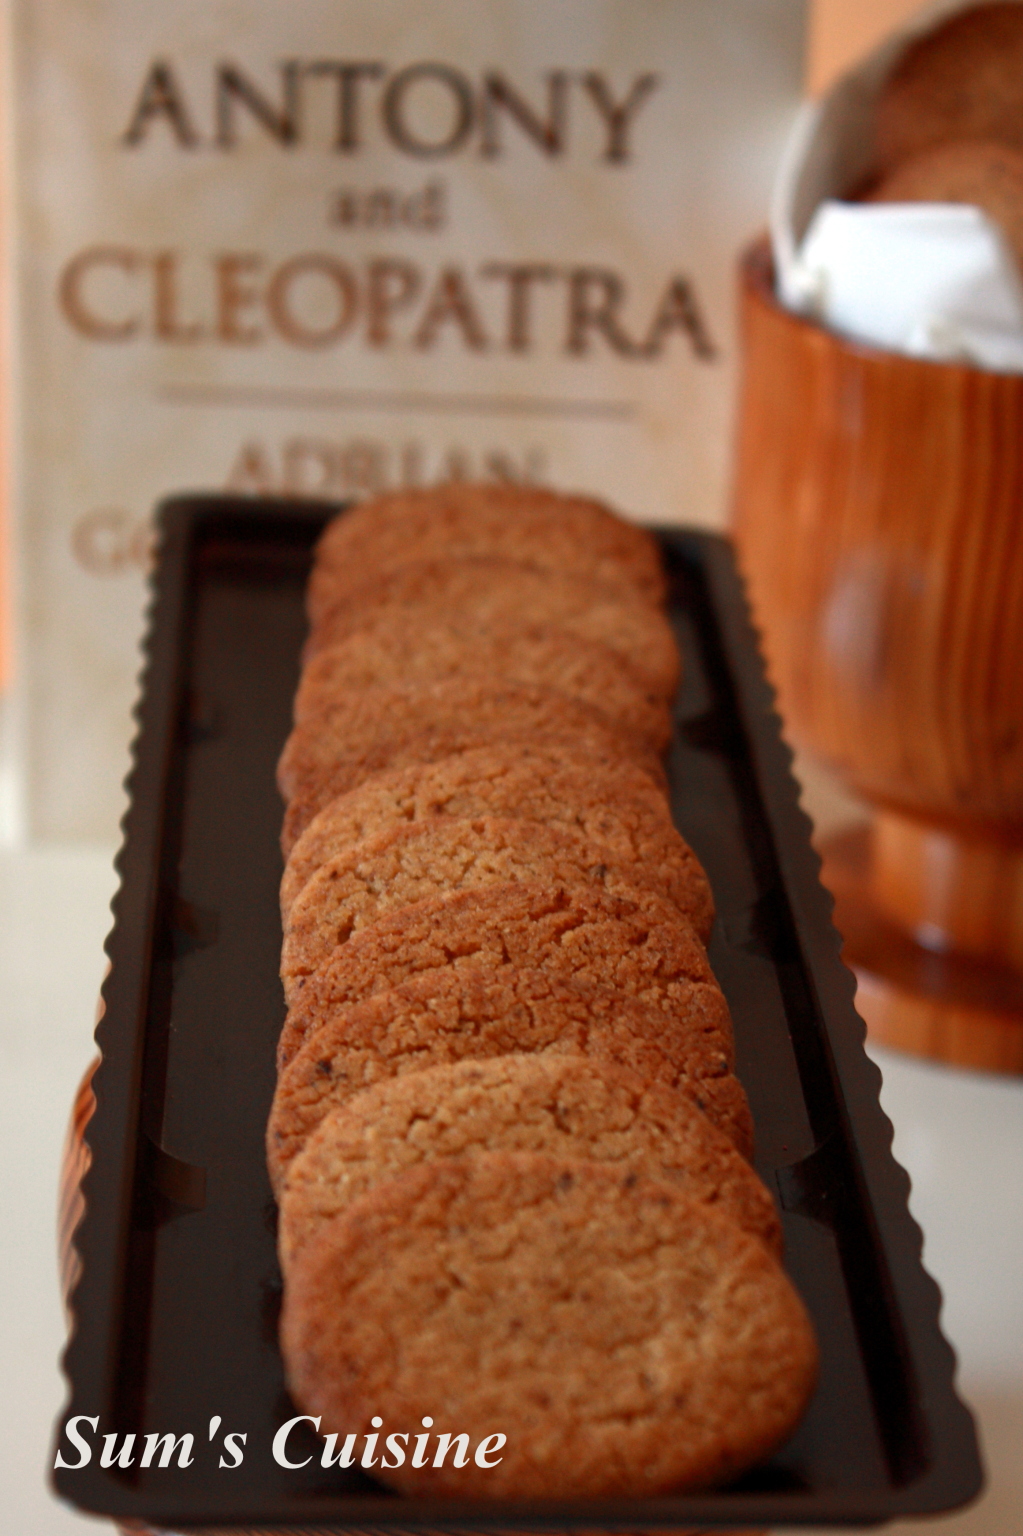
The first time I made these cookies was late one Saturday night when we were watching movie after movie and I suddenly felt like munching something! Went into the kitchen during a couple of commercial breaks and Ta-Da! It was ready! Had used the food processor then and it was such a breeze to bake them! And well, the batch I baked that night got over even quicker ;) But i did have more of the cookie dough saved up in the fridge, which I baked again a couple more times and they didn't last long enough either, to take some decent pics!

Being coffee lovers that we are, we literally fell in love with these cookies. But then the amount of butter that goes into it restrained me from making them quite often :). But then it is Okay to indulge once in a while, right? Some solace is that it is also loaded with healthy fat from walnuts. So made another batch of these recently and made sure we get some pics this time!

I had bookmarked this recipe from Suma's Cakes and More, which is originally from Alice Medrich's Pure Dessert. It is a breeze if making in a food processor; making it by hand is not very tedious either. And the best part is the dough can be stored in the fridge as logs for a few days and when needed, all the work needed to be done is pull out one log, cut it into discs and bake! 


Since it makes quite a huge batch, this is a blessing, rather than having to make all the cookies at once, and rolling them on palms! I chose to make rather small cookies and got about 25-30 cookies from each log and there were 5 logs! Shared them with friends also, after devouring them enough. The cookies also stay fresh for quite a long time - about a month in an airtight container, that is if you can resist it that long! 

Coffee Walnut Cookies

Preparation time: 15 min (if using food processor; slightly more if making by hand)
Baking time: 10 - 17 minutes (See below for details)
Makes: ~100 small cookies / 50-60 medium ones

Ingredients:
All Purpose Flour – 2 cups 
Walnuts – 1 cup (roughly chopped)
Sugar – 3/4 cups
Salt – 1/4 tsp 
Unsalted butter – 3/4 cup ( 170 grams) / chilled and roughly cut up (I reduced it by 2-3 Tbsp and added some milk instead)
Milk- 1.5 Tbsp (Added this to replace part of butter; not needed if using the entire amount of butter)
Instant coffee- 3 teaspoons (Divided use, original recipe has fresh ground coffee beans)
Coffee Essence – 1 tsp (skipped this)
Vanilla Essence - 1 teaspoon
Coffee beans –  to put on top (I didn't use this)

Method: 
  • Put the walnuts, flour, sugar and salt if using, in the bowl of a food processor and pulse till the walnuts are finely ground. (If not using food processor, do this step in batches in a mixie jar.)
  • Pulse again with 2 teaspoons of coffee till well blended. (If not using the food processor, continue with a hand mixer or even by hand in a large bowl). 
  • Add chilled butter and pulse again till breadcrumb like mixture forms (or mix with a large fork)
  • Add the coffee extract and vanilla essence; pulse just until the dough begins to form lumps around the blade. (Mix the dough together either by hand mixer or even by hand till it roughly comes together.)
  • Take out the mixture; pull together to form a dough; add milk if you feel there is a need for binding; knead briefly to make it smooth. 
  • Roll into logs (I made 5 small round logs) wrap in cling wrap and chill for at least 2 hours or overnight.

To bake the cookies:
  • Pre-heat oven to 180 degrees C / 375 degrees F.
  • Take logs out, slice 1/4″ apart. I made them thinner as I wanted smaller cookies. If slicing as 1/4 inch, they spread out more too.
  • Push a coffee bean firmly in the center of each cookie, if using. 
  • Roll the edges of a few in the remaining coffee if you wish. 
  • If the cookies do not get a good round shape when sliced, just shape it holding it gently but firmly against your palm.
  • Place the cookies slightly apart on ungreased pan and bake.
  • If making small cookies or using milk in place of butter, they get done in 9-10 minutes. If making larger cookies or using the entire butter, they take about 15 to 17 minutes.
  • The edges will be slightly starting to brown, and the cookies will still be soft when done. They get crisp once they cool.
  • Cool completely and store in air tight container or just finish off a batch... nothing like warm cookies just out of the oven ;)

Notes:
  • The first time I used a food processor and the next time made the dough by hand. If making by hand, make sure you mix pretty fast before the butter starts to melt due to your body temperature.
  • Replacing part butter with milk didn't change the taste much.
  • I baked the 5 logs in 3 batches, just when needed - they stayed in fridge for 3-4 days and were fine.


Monday, June 17, 2013

Banana Split Icecream


I've become so lazy to clean the house these Days, I'm surprised at myself! But have been doing other things - things that I love, so some consolation! Well, i have Always hated cleaning, though i like the house to be clean :D
 
And this poem i came across on FB a few Days perfectly describes me! And I seem to have taken it quite too seriously that the house was in a big mess. And I had to clean it lest we had to run away elsewhere!!
 
And so started the boring task of cleaning.... and after a couple of minutes I was hungry! Yeah... Another excuse, you say? Huh.... My Eyes went to the lone banana lying on the table and just as i was about to grab it and eat, my head started dreaming of a banana split icecream! Ahhh... I wanted it NOW!
 
But then i exercised some restraint to wait till i finished the cleaning before indulging in a plateful of sinful icecream. And it really worked! I finished the cleaning in the shortest possible time, took a shower in just a couple of minutes and ran to the kitchen to fix up that plate! Ahhh... miss the Corner House in namma Bengaluru.... This is no recipe as such, but a wonderful way to indulge!
 
 
In its classic form it is served in a long dish called a boat. A banana is cut in half lengthwise (hence the split) and laid in the dish. There are many variations, but the classic banana split is made with scoops of vanilla, chocolate and strawberry ice cream served in a row between the split banana. Pineapple topping is spooned over the strawberry ice cream, chocolate syrup over the vanilla, and strawberry topping over the chocolate. It is garnished with crushed nuts, whipped cream, and maraschino cherries [Wiki]
 
This is no recipe as such, but a wonderful way to indulge! Feel free to pair up any flavor of icecream that you like and any topping you fancy... and enjoy!

Banana Split

Ingredients:
(For one serving - Scale up as you wish)
One long banana
Scoops of ice Creams - Vanilla, Chocolate, Strawberry - I used Chocolate bits, Strawberry and vanilla
Toppings - Chocolate sauce, Strawberry sauce (I didn't have patience to make a chocolate sauce, so used nutella instead!)
Pineapple pieces - a few - i used mango instead
Chopped toasted nuts - Walnuts, cashews, peanuts if you fancy

Method:
  • Split the banana into two, lengthwise and Place on a serving platter
  • Scoop out one scoop of each icecream
  • Top it with one of the toppings on each of the icecream scoop
  • Sprinkle with the chopped nuts
  • Wait no longer to indulge!! Enjoy!!