Showing posts with label Cookies 'n Biscuits. Show all posts

Friday, July 18, 2014

Chocolate Wafers

I can never get enough of chocolate! Well, I looove to bake with chocolates and trying out different chocolate based bakes makes me happy! And well, who doesn't like cakes and cookies with chocolates? So it is Chocolate wafers this this around here!
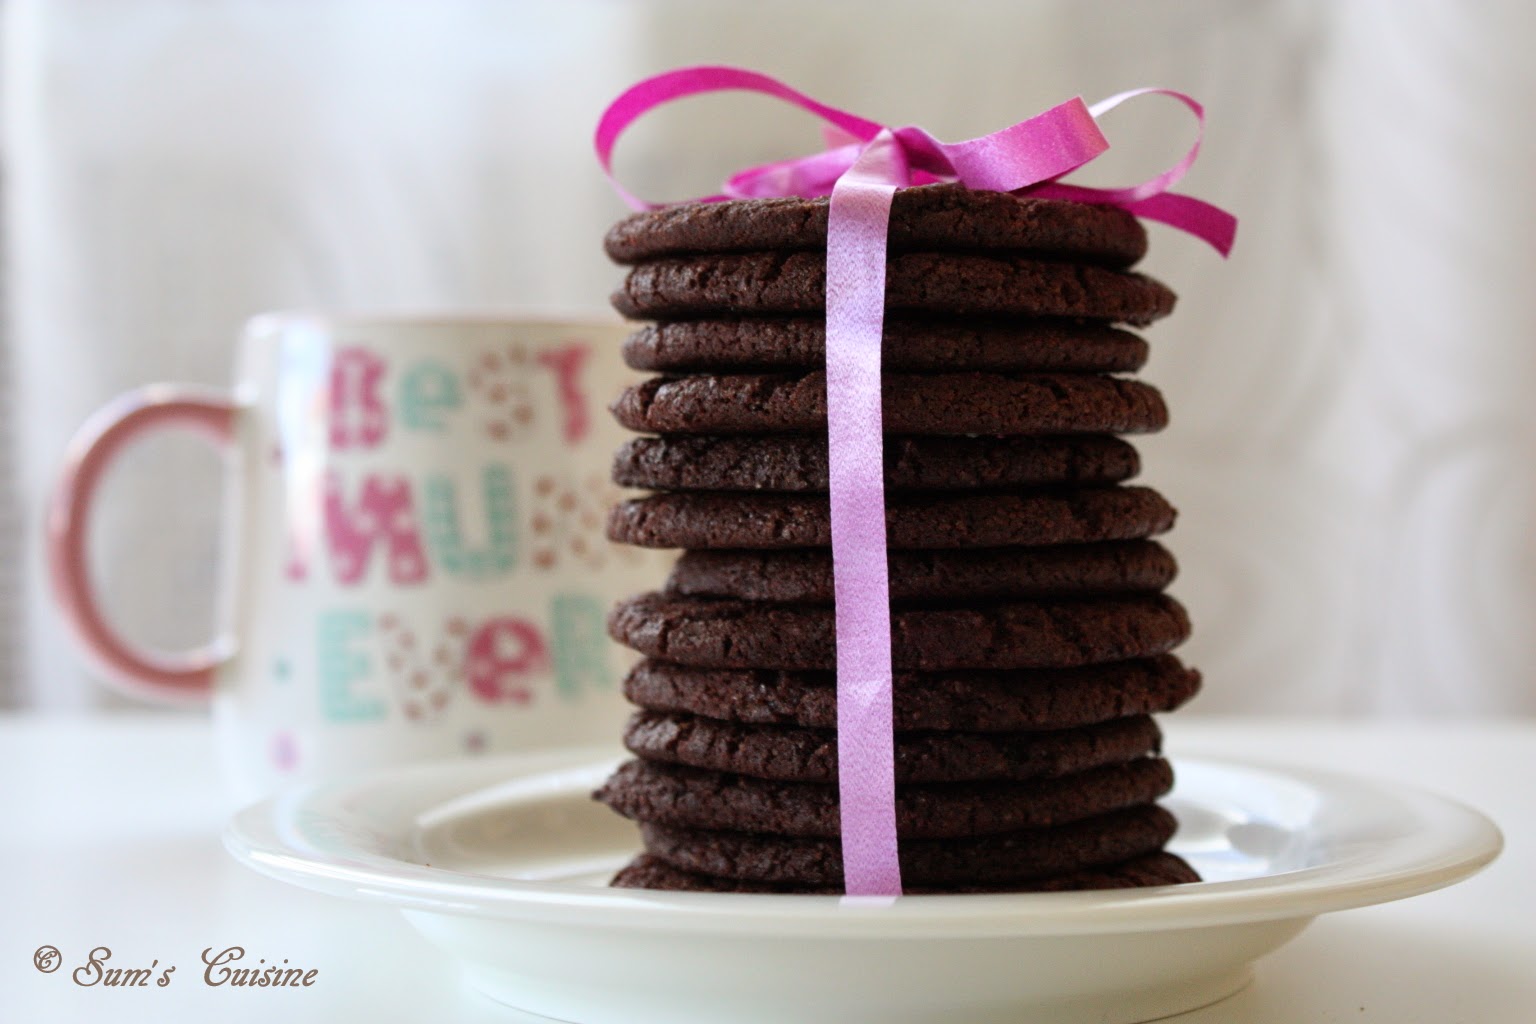

I thought of deferring posting this as my previous post was Wacky Chocolate Cake, but couldn't resist my temptation to share it! The pics of other stuff that I've made and shot are not yet processed and why not post the same, I thought....


Well, these chocolate wafers are really simple to put together. The dough making took hardly 15 minutes of my time and then off it went to the fridge, in the form of logs. The excess can be dumped into the freezer too! It can be pulled out of the refrigerator whenever necessary, cut into slices and baked. And the baking time is also very little – 10 minutes for a batch is nothing, if you ask me, especially what comes out is a batch of drool worthy, chocolaty cookies!


And did I tell you these have very very little fat?? And they stay fresh for about two weeks!! Hope you'll enjoy these as much as we did! Here's the recipe....

Chocolate Wafers


Preparation time: 15 min
Resting time: Overnight
Baking time: 12 min
Makes: 36 - 40 cookies
Source: Joy of Baking

Ingredients:
All Purpose Flour - 1 cup (130 grams)
Unsweetened Cocoa powder - 1/2 cup (50 grams) (regular or Dutch-processed)
Baking soda - 1/4 tsp
Salt - 1/4 tsp
Unsalted Butter - 3 Tbsp (45 grams), room temperature
Margarine - 3 Tbsp (45 grams)
Packed light brown sugar - 2/3 cup (140 grams)
White granulated sugar - 1/2 cup (100 grams)
Pure Vanilla extract - 1 tsp
Egg white - 1 large (30 grams)

Method:
To make the Dough:
  • In a bowl, sift or whisk together the flour, cocoa powder, baking soda, and salt.
  • In the bowl of your electric mixer (or with a hand mixer), beat the butter and margarine until well blended.
  • Add the sugars and vanilla extract and beat on high speed for about one minute. Scrape down the sides of the bowl.
  • Beat in the egg white.
  • Add the flour mixture and beat just until incorporated.
  • Place the dough on your counter and, using your hands, evenly form the dough into a log shape that is about 9 inches (23 cm) long. I made two smaller logs of about 5 inches long
  • Carefully wrap the dough in aluminium foil, parchment paper or wax paper and fold or twist the ends. Try not to flatten the log.
  • Refrigerate until firm. This will take several hours or you can even chill it overnight.
To bake the Cookies:
  • Preheat the oven to 180 deg C (350 degrees F) and place the oven rack in the center of the oven. Line two baking sheets with parchment paper.
  • Using a sharp knife, slice the log into about 1/4 inch (6 mm) thick wafers.
  • Place the wafers on the baking sheet spacing, about 1 inch (2.5 cm) apart.
  • Bake for approximately 10 - 12 minutes or until the the cookies puff and the tops of the cookies have cracks (ripples).
  • Remove from oven and let the cookies cool on the baking sheet for about 5 minutes before removing to a wire rack to cool completely.
  • Can be stored in an airtight container, at room temperature, for about 10 days. They can also be frozen.
Notes:
  • I used 90 g (6 Tbsp) of dairy free margarine only
  • I made two smaller logs and baked them on separate days.
  • Baking for 10 minutes gave slightly chewy cookies and 12 minutes gave crispy ones


Wednesday, June 26, 2013

Coffee Walnut Cookies


The first time I made these cookies was late one Saturday night when we were watching movie after movie and I suddenly felt like munching something! Went into the kitchen during a couple of commercial breaks and Ta-Da! It was ready! Had used the food processor then and it was such a breeze to bake them! And well, the batch I baked that night got over even quicker ;) But i did have more of the cookie dough saved up in the fridge, which I baked again a couple more times and they didn't last long enough either, to take some decent pics!

Being coffee lovers that we are, we literally fell in love with these cookies. But then the amount of butter that goes into it restrained me from making them quite often :). But then it is Okay to indulge once in a while, right? Some solace is that it is also loaded with healthy fat from walnuts. So made another batch of these recently and made sure we get some pics this time!

I had bookmarked this recipe from Suma's Cakes and More, which is originally from Alice Medrich's Pure Dessert. It is a breeze if making in a food processor; making it by hand is not very tedious either. And the best part is the dough can be stored in the fridge as logs for a few days and when needed, all the work needed to be done is pull out one log, cut it into discs and bake! 


Since it makes quite a huge batch, this is a blessing, rather than having to make all the cookies at once, and rolling them on palms! I chose to make rather small cookies and got about 25-30 cookies from each log and there were 5 logs! Shared them with friends also, after devouring them enough. The cookies also stay fresh for quite a long time - about a month in an airtight container, that is if you can resist it that long! 

Coffee Walnut Cookies

Preparation time: 15 min (if using food processor; slightly more if making by hand)
Baking time: 10 - 17 minutes (See below for details)
Makes: ~100 small cookies / 50-60 medium ones

Ingredients:
All Purpose Flour – 2 cups 
Walnuts – 1 cup (roughly chopped)
Sugar – 3/4 cups
Salt – 1/4 tsp 
Unsalted butter – 3/4 cup ( 170 grams) / chilled and roughly cut up (I reduced it by 2-3 Tbsp and added some milk instead)
Milk- 1.5 Tbsp (Added this to replace part of butter; not needed if using the entire amount of butter)
Instant coffee- 3 teaspoons (Divided use, original recipe has fresh ground coffee beans)
Coffee Essence – 1 tsp (skipped this)
Vanilla Essence - 1 teaspoon
Coffee beans –  to put on top (I didn't use this)

Method: 
  • Put the walnuts, flour, sugar and salt if using, in the bowl of a food processor and pulse till the walnuts are finely ground. (If not using food processor, do this step in batches in a mixie jar.)
  • Pulse again with 2 teaspoons of coffee till well blended. (If not using the food processor, continue with a hand mixer or even by hand in a large bowl). 
  • Add chilled butter and pulse again till breadcrumb like mixture forms (or mix with a large fork)
  • Add the coffee extract and vanilla essence; pulse just until the dough begins to form lumps around the blade. (Mix the dough together either by hand mixer or even by hand till it roughly comes together.)
  • Take out the mixture; pull together to form a dough; add milk if you feel there is a need for binding; knead briefly to make it smooth. 
  • Roll into logs (I made 5 small round logs) wrap in cling wrap and chill for at least 2 hours or overnight.

To bake the cookies:
  • Pre-heat oven to 180 degrees C / 375 degrees F.
  • Take logs out, slice 1/4″ apart. I made them thinner as I wanted smaller cookies. If slicing as 1/4 inch, they spread out more too.
  • Push a coffee bean firmly in the center of each cookie, if using. 
  • Roll the edges of a few in the remaining coffee if you wish. 
  • If the cookies do not get a good round shape when sliced, just shape it holding it gently but firmly against your palm.
  • Place the cookies slightly apart on ungreased pan and bake.
  • If making small cookies or using milk in place of butter, they get done in 9-10 minutes. If making larger cookies or using the entire butter, they take about 15 to 17 minutes.
  • The edges will be slightly starting to brown, and the cookies will still be soft when done. They get crisp once they cool.
  • Cool completely and store in air tight container or just finish off a batch... nothing like warm cookies just out of the oven ;)

Notes:
  • The first time I used a food processor and the next time made the dough by hand. If making by hand, make sure you mix pretty fast before the butter starts to melt due to your body temperature.
  • Replacing part butter with milk didn't change the taste much.
  • I baked the 5 logs in 3 batches, just when needed - they stayed in fridge for 3-4 days and were fine.


Sunday, January 27, 2013

Column 4: Cookies

Here's the fourth of my column in Vijaya Karnataka, a kannada daily... Date: Sunday, 27 Jan 2013. Pg 21
The original cookies are here on the blog - http://sumscuisine.blogspot.se/search/label/Cookies%20%27n%20Biscuits


Friday, December 28, 2012

Svenska Pepper Kakor / Swedish Spice Cookies


The other most common Christmas goodies here are these Pepper Kakor/ Pepper cookies. There are boxes and boxes of these in all the stores and super markets. And the stores are offering samples of these to customers, people are buying them or making them in bulk to eat and distribute among friends and relatives.

These cookies are paper thin, very crisp and almost melt in the mouth once you chew it. With significant flavors of spices like Cinnamon, Pepper, Ginger, Cloves and with tastes of sweetness, salt and heat from the pepper, they are quite interesting. And let me warn you – they fit into the 'can't stop eating, one after the other' category!! I halved the recipe below, and it was quite sufficient for us – half the dough still lies in the freezer, and there are still some more baked cookies left over too – in spite of eating them constantly!! So it makes quite a huge batch.

Svenska Pepper Kakor / Swedish Spice Cookies


Preparation time: ~10 min + ~20 min + resting time
Baking Time: ~10 min
Adapted from: Many sources on the net

Ingredients:
  • Sugar – 1 ½ cups
  • Shortening - 1 cup
  • Egg - 1
  • Molasses - 2 Tbsp [I omitted this – see notes]
  • Vinegar - 2 Tbsp
  • All Purpose Flour - 3 cups
  • Baking soda - 2 tsp
  • Salt – ½ tsp
  • Finely ground Cinnamon - 1 tsp
  • Finely ground Cloves - 1 tsp
  • Finely ground Ginger - 1 tsp
  • Finely ground pepper - 1 tsp [I also used a little chili flakes for extra heat!]

Preparation

  • Mix sugar, shortening, egg, molasses, and vinegar together well.
  • Sift together flour, soda, salt, cinnamon, cloves and ginger.
  • Mix the two together.
  • Cover in a cling wrap and chill in the refrigerator for a few hours or overnight
  • Preheat the oven to 170°C and line two or three large baking sheets with baking parchment.
  • Roll out the biscuit dough with a floured rolling pin on a lightly floured surface until it is roughly 2mm thick. [The thinner you roll it, the crisper the biscuits will be – but if the dough gets too thin, the biscuits will be tricky to transfer to a baking sheet – see notes for why mine are shaped so badly]
  • Bake on the middle shelf of the oven for 8-10 minutes or until golden brown and crisp.
  • Allow to cool on a wire rack while you repeat the rolling, cutting and baking until all the dough is used up.
  • If you find that the cooled biscuits are still a little soft, you can always pop them back in a 150°C oven to dry out.
  • Cool completely and store in airtight containers – they stay fresh for several days – apparently even a couple of months.
Notes:
  • This dough freezes well, so you can mix a batch and freeze half for later use.
  • Since I didn't have molasses, I just omitted it. I should have substituted honey for it. Since the binding of the dough was thus less, rolling and cutting out shapes was quite difficult for me – as I wanted them real thin like in the stores. It took a lot of juggling to do it, so I simply pinched out marble sized balls of the dough and pressed them flat on the baking tray and with a rolling pin, rolled them thin. That explains the uneven circles!

Monday, December 10, 2012

Baked Nippattu


So this was the second item I sent home with the friend travelling. Something savory is sure to please my in-laws’ palette and deep frying was not my thing that day. So baked nippattu, it was.


Nippattu is a savory, crisp disc like snack, traditionally deep fried. And of late the Iyengar bakeries in Bangalore do have the baked version as well. And they are equally relished at home. 


There are so many nippattu recipes around, but I was looking to make the Iyengar bakery version. So tried out this recipe and it was pretty close. May be a little more fat would have made it exact the same, but it was crispy never the less.

Here’s the recipe…

Baked Nippattu

Preparation Time: 15 min
Baking Time: ~30 min
Makes: About 30
Source: Multiple sites on net with my own adaptations

Ingredients:
All Purpose Flour / Maida – 1 Cup
Wheat Flour – 1 Cup
Baking Soda – 1 tsp
Onion – 1 big, finely chopped
Green Chilies – 2 or 3, finely chopped (adjust acc to taste)
Fresh Coriander Leaves – a handful, finely chopped I omitted this and added curry leaves
Sesame Seeds - 1 Tbsp
Roasted peanuts - 1/4 Cup
Salt – 1 tsp
Sugar – 1 tsp
Oil – ½ Cup
Warm Water – ¼ Cup


Method:
  • In a wide bowl, add the flours, salt, sugar, sesame seeds and baking powder. Mix well.
  • If using peanuts and curry powder, run them in mixie once to crush coarsely. Add to the flour mixture
  • Now add the finely chopped onion, green chilies, and coriander leaves. Mix well.
  • Add the oil and mix again, until the oil is well incorporated.
  • Now add water little by little and knead into smooth dough.
  • Cover with a damp cloth and rest the dough for about 30 minutes.
  • Preheat oven to 160 degrees C.
  • Pinch out lime-sized ball out of the dough.
  • Place it between 2 thick plastic sheets and roll it with rolling pin, to make about 4” diameter circles
  • To form neat circular discs, use a stainless steel lid of suitable size, and cut out the flattened dough.
  • Gently remove this disc on to a greased baking tray.
  • Continue with the remaining dough in a similar way.
  • Poke the discs with a fork to avoid fluffing up.
  • Bake for 15 to 20 minutes, flipping once after 10 minutes. I used two plates at once and mine took about 23 minutes.
  • Cool completely and store in airtight containers.
Notes:
  • Roll out discs of uniform thickness for uniform baking
  • If using multiple trays, flip the trays once in between

This post is for the Bake-A-Thon event by Champa. These are the other co-bloggers baking with me... 
Champa, Srivalli Jetti, Priya Suresh, Veena Krishna Kumar and Preeti Deo.

Friday, December 7, 2012

Cornflakes Cookies


When a friend here was travelling back to Bangalore, we decided to send with him some goodies to folks at home. Chocolates and candies were bought for little niece Hima, a hand knitted woolen hat was packed for FIL. And then I felt I needed to send something else too… they are missing us at home, and something else, home-made, would probably cheer them up a bit… so it was decided that I’d be baking something!


Cakes were out of choice as it’d reach them after at least 3-4 days. The next best thing was cookies. So there it was, I set about baking a large batch of cookies - cornflakes cookies it’d be. I started out with Racheal Allen’s basic cookie dough (which I've tried a couple of times with great success) but realized it had way too much of fat in it. Of course it’d taste good, but it’d take almost half of my half a kilo pack of butter!! Oh well, that seemed too much!!


My mom used to make these cookies, but I didn’t want to trouble her as she was touring some place with her friend. So I dared to make my own recipe!! Voila!! It did come out good… Crispy too, as I added baking powder, and reduced the butter by about half. The corn flakes also add to the texture. And I was glad I could experiment something myself!


Here’s the recipe…

Cornflakes Cookies

Preparation Time: 15 min
Baking Time: ~20 min
Makes: About 30
Source: Self experiment

Ingredients:
All Purpose Flour / Maida – 2 Cup
Sugar - 3/4 cup (increase to 1 cup if you like it very sweet)
Butter - 100 g at room temperature
Baking Powder – 1 1/2 tsp
Corn flakes - 3/4 Cup, crushed
Salt – 1/8 tsp
Milk – 3-4 Tbsp
Vanilla - 1 tsp


Method:
  • Preheat oven to 180 degrees C.
  • Mix baking soda and salt to flour and sieve a couple of times for even distribution
  • Cream butter and sugar till creamy
  • Add in flour mixture and mix well; the mixture will be crumbly
  • Mix in 1/2 cup of crushed corn flakes
  • Add milk little by little and gather to form a firm dough
  • Pinch in big marble sized balls of the dough, roll it between your palms to a sphere and press it to flatten
  • Press it on the remaining corn flakes mixture to coat the top of the cookie with it
  • Repeat with the rest of the dough
  • Arrange on a lined and greased baking sheet leaving gap between the rows
  • Place in the preheated oven and bake for 15 to 18 minutes
  • Cool completely and store in airtight containers.

Notes:
  • Roll out cookies to uniform thickness for uniform baking
  • If using multiple trays, flip the trays once in between
This post is for the Bake-A-Thon event by Champa. These are the other co-bloggers baking with me... 
Champa, Srivalli Jetti, Priya Suresh, Veena Krishna Kumar and Preeti Deo.

Thursday, October 18, 2012

Chocolate Almond Biscotti


Of late, I’m on the look-out for baking recipes that will not add too many calories to my diet and will last long, that will serve as our tea time / between meal snack. If it stays long, I don’t have to repeat the snack every day till it gets over! Rather alternate it between something else so it is not boring.

Biscotti fit quite well into this - they are not loaded with fat / sugar, nuts if added, make you feel full, last long and quite easy to make.

Biscotti are Italian originated, twice baked biscuits. They are oblong-shaped, made dry and crunchy through cutting the loaf of dough while still hot and fresh from baking, and baked again to make crispy.

This biscotti is loaded with almonds, chocolate chunks and makes it a hearty snack with tea/coffee. It yields quite a big batch - lasted us for more than two weeks, in spite of sending away some for D’s colleagues. But stays fresh all the while, though, so can relish it for longer!


Here’s the recipe…

Chocolate Almond Biscotti

Preparation Time: 15 min
Baking Time: 25 min + ~20 min
Makes:  ~ 25-30 Biscottis
Source: Joy of Baking

Blanched whole almonds - 3/4 cup (110 grams) See Notes for blanching almonds
White sugar -2/3 cup (135 grams)
Eggs - 2 large
Vanilla extract - 1 tsp
Baking Powder - 1tsp
Salt - 1/4 tsp
All purpose flour /Maida - 1 3/4 cups (230 grams)
Semi-sweet or Bittersweet chocolate - 2/3 cup, chopped into bite-sized chunks (can use chocolate chips)

Method:
For the dough
  • Preheat oven to 180 degrees C (350 degrees F).
  • Toast almonds for 8-10 minutes or until lightly browned and fragrant. Let cool and then chop coarsely. Set aside.
  • Line a baking sheet with parchment paper.
  • In bowl of your electric mixer (or with a hand mixer), beat the sugar and eggs on high speed until thick, pale, and fluffy (about 5 minutes). And beat in the vanilla extract.
  • In a separate bowl, whisk together the flour, baking powder and salt.
  • Add to the egg mixture and beat until combined.
  • Fold in the chopped almonds and chocolate.
First Bake
  • Transfer the dough to a well floured counter and roll into a log shape, about 12 inches (30 cm) long and 3 1/2 inches (9 cm) wide.
  • You may have to flour your hands to form the log as the dough is quite sticky.
  • Place on your baking sheet and bake for about 25 minutes or until firm to the touch. Remove from oven and let cool on a wire rack for about 10 minutes.
Second Bake
  • Reduce oven temperature to 325 degrees F (165 degrees C).  Transfer the log to a cutting board and cut into about 1/2 inch (1.25  cm) slices, on the diagonal.
  • Place the biscotti, cut side down, on the baking sheet. Bake for about 8-10 minutes, turn slices over, and bake for another 8-10 minutes or until golden brown.
  • Remove from oven and let cool. Store in an airtight container. 
Notes:
  • Store bought Blanched Almonds can be used or regular almonds can be blanched at home like this.
  • Blanching almonds: Place almonds in boiling water for about 1 minute. Drain and place in ice water to stop further cooking of the almonds. Peel the skin off with your fingers. Bake them in a 350 degree F (180 degree C) oven for about 5-10 minutes, or until almonds are dry, but have no color.

(These lovely pics are courtesy D)

Wednesday, July 11, 2012

Spicy Biscotti


So with a full sized oven and lot of time to spare, there is no surprise that I feel like baking every now and then. But unfortunately, it’s just the two of us here, and even if I send a portion of what I make to his office for his colleagues, the remaining part itself is too much for us! So as to make sure not to bloat up with all the calories that goes in, I consciously look for some low calories bakes, and also small sized portions. Got this apt recipe from Champa’s Versatile Kitchen, and adapted it so as to be in lines of our Khara biscuit, but with a lesser fat content.


The quantity of this batch is also small, makes about 10 small sized biscottis, perfect for my conditions! And it tasted good, as a tea time snack or simply to munch in between meals.

Spicy Biscotti

Preparation Time: 10 min
Baking Time: 30+20 min
Makes: 10 medium sized biscottis

Ingredients:
All purpose flour - ¾ cup (I used ½ APF + ¼ WWF)
Rice flour - 2 Tbsp (the original says corn flour; I replaced with rice flour)
Egg - 1
Olive oil - 2 Tbsp (Can use vegetable or canola oil)
Sugar - 1 Tbsp (I skimped on this but felt it’d have tasted better with 1 Tbsp)
Salt - ½ tsp, or to taste
Baking Powder - ½ tsp
Cumin seeds - 1 tsp
Green chilies - 2, or to taste
Coriander leaves - 2 tbsp
Curry leaves - 2-3 sprigs

Method:
  • Preheat the oven to 160 deg C.
  • Line a baking sheet with parchment paper. Set aside.
  • Run the cumin seeds, green chilies, coriander and curry leaves in a blender without water to get a coarse mixture
  • Mix egg, oil and the ground spices in a bowl and whisk together.
  • In a bigger bowl take all the dry ingredients. Whisk them to combine.
  • Add the egg mixture to dry ingredients and mix with your hand, to get a dry dough.
  • Shape into a log and press so that it is half an inch thick.
  • Bake for 30-35 minutes, till the sides are slightly brown
  • Let it cool for 10 - 15 minutes.
  • When cool enough to slice the log, slice the log to ½" - ¾” thick pieces.
  • Keep them on the cookie sheet, standing on their bottom edges and bake for 20 minutes at 140 deg C, till dry.
  • Let them cool on wire rack.
  • Store in an air tight container when completely cool.

Notes:
  • These do stay fresh in an airtight container at room temperature for more than a week. Champa says these freeze well too.
  • To make it eggless, use ¼ cup of yogurt in place of egg, as does she
  • The same can be done with Italian herbs and chili flakes or ground pepper, in place of the Indian spices, to get a different flavor

Tuesday, January 10, 2012

Nan Khatai


No more rants about how busy I am and how little time I get these days to do something I really want to. The house is still in a mess with painting work still in the last and boring stages… and wedding preparation going on in full zoom…
So these cookies that I had planned for Suma’s Cookie fest event here got postponed and postponed till the very last day. Yes, I’m glad I finally managed :D. I’d have felt bad if I didn’t send across my entry to her event as she is one impressive blogger, amazing baker, a nice story teller… her blog is truly inspiring! Keep blogging more and more, Suma, for us to enjoy and learn from you.
So here’s one Indian cookie - Nan Khatai for her event. I got the recipe from the recipe book that I got along with my LG convection microwave oven. The cookies were made with double the quantity given here and were liked by a lot of people.
Here we go with the recipe!


Nan Khatai


Preparation time : 15 min
Cooking time : 15-20 min
Makes : 20 cookies


Ingredients:
All Purpose Flour / Maida - 200g
Semolina / Fine sooji / rava - 100g
Cooking oil / ghee / butter - 150g
Baking soda -1/4 tsp
Sugar - 150g
Curd - 2 Tbsp
Milk - 4-5 Tbsp
Cardamom powder - ½ tsp
Pistachio - 20g, finely chopped (I skipped this and placed a raisin on each cookie)

Method:
• Preheat oven to 160 deg C
• Grease a cookie tray and keep aside
• Beat oil/ghee/butter, sugar and curd together
• Sieve flour, semolina, cardamom powder and baking soda together in a bowl
• Mix with the curd mixture
• Add milk to form a soft dough
• Divide the dough into 20 small balls and place on the greased cookie tray 2 inches apart. Press each ball slightly with your fingers
• I made slightly bigger disks and used my cookie cutter to cut into shapes
• Place a raisin on each cookie and press it in slightly. If using pistachio, garnish the top with it.
• Bake in the preheated oven at 160 deg C for 15 - 20 minutes, till the edges are slightly browned.
• Cool completely on a wire rack before storing in an air tight container
• This stays for about a week if preserved well

Notes:
• I avoided butter and used part oil and part ghee for the unique flavor.
• You can substitute the cardamom powder with vanilla essence for a different flavor


Sunday, November 21, 2010

Shortbread Cookies

This was another of the saved baking recipes I had got from Joy of Baking. The shape and color had me bowled over and I had to try these. Especially for the newly bought, still unused heart shaped cookie cutter! Followed the recipe almost as is, though I didn’t follow the measurements exactly. The outcome was good, and was well received. This is sure to be a keeper, especially with the variations in texture that can be made.
Here’s how to make them....

Shortbread Cookies

Preparation time : 15 min + resting time
Cooking time : 15 min
Makes : ~20

Ingredients:
All purpose Flour (maida) - 2 cups
Unsalted butter - 1 cup, in room temperature
Powdered Sugar - ½ cup
Vanilla extract - 1 tsp
Salt - a small pinch - ¼ tsp

Method:
• In a bowl mix flour and salt well
• In another bowl, beat butter till creamy for about a minute or two
• Mix in sugar and continue to beat till fluffy for another few minutes
• Add vanilla extract and mix thoroughly
• Fold in the flour and mix to combine. Do not knead.
• Flatten the dough, wrap it in a sheet and place it in refrigerator for 30 min
• After half an hour, remove from refrigerator, and flatten it using a rolling pin and cut out desired shapes.
• Place these on a greased tray, till all the dough is used up
• Place it in the refrigerator for 10 more minutes to firm up, so that the cookies retain the shape when baking
• Preheat the oven at 180 ºC and bake for 15 minutes. Check after about 10 minutes and adjust the time, not to over bake or under bake. A slight golden at the edges should be enough
• Let the cookies stand on the baking sheet till cool enough, else they crumble when tried to lift when hot
• Allow it to cool completely and then store away the rest in a tight container

Tips n Tricks:
• I found the dough too brittle to roll and cut. So I pinched out a small ball and flattened it on palm and cut the same with a cookie cutter

Variations:
• For a slightly crunchy texture replace 1/4 cup of the all purpose flour with rice flour
• For a more delicate tasting shortbread, with a melt-in-your-mouth texture, replace 1/2 cup of the all purpose flour with cornstarch (corn flour).

Sending these to Champa's Bake-off event.

Sunday, November 14, 2010

Wheat, Oats and Sesame Crackers

After a few failed attempts at baking and a loooong time, I desperately wanted to bake something. I had saved so many recipes from co-bloggers that I had to bake something. I chose Suma’s Sesame crackers with oats and wheat flour mainly for its simplicity and few ingredients. And oats and wheat make it way healthier than the regular all purpose flour.
More excited than me for baking was my little niece Hima, who eagerly waited for me to knead the dough and was desperately waiting to cut the cookies. Once done, she was hooked in front of the oven, waiting for me to get the crackers out of the oven. She tasted a little piece and said 'Wowwwwwww atte!! Suuuper'!! It came as a surprise to me as I was expecting her to like the sweet cookies I was making in parallel, than these. The next couple of days she'd suddenly remember about the crackers stored in the kitchen counter and demand a couple of them! Ok, Suma, the credit goes to you :)
Here's the recipe with a slight change from the original...


Wheat, Oats and Sesame Crackers

Preparation time : 15 min + resting time
Cooking time : 18-20 min
Makes : 35-40

Ingredients:
• Wheat flour (Atta) - 1 cup
• Oats - ½ cup ( I used Quaker)
• Oil - 1 tbsp
• Butter - 2 Tbsp
• White sesame seeds - ¼ cup
• Salt per taste
• Baking Powder - ½ tsp
• Dry ginger powder - 1 tsp
• Chili flakes - 1 tsp
• Water - as required to knead the dough

Method:
• Coarsely powder oats
• In a bowl add the wheat flour, oats, baking powder, and salt. Add ginger powder, chili flakes, sesame seeds. Combine well.
• Add oil. Melt the butter and add at this stage.
• Add water little by little to form a thick chapathi like dough. Keep aside undisturbed for 30mins.
• Divide the dough into half. Roll each half thin and cut into squares or sticks or any desired shape. Combine the scrapings and repeat the same with the other half too.
• Preheat oven to 180ºC. Place the squares on a greased baking sheet and bake for about 15-18 minutes or until the crackers are crisp. The baking time depends on the thickness of the squares and the oven settings
• Allow it to cool completely and then store away the rest in a tight container
• Tastes great with a cup of tea

Variations:
• The original recipe by Suma had garlic paste instead of ginger and chili flakes
• I increased butter to 2 Tbsp

Sending these to Champa's Bake-off event.