Showing posts with label Sweets 'n Desserts. Show all posts

Monday, June 17, 2013

Banana Split Icecream


I've become so lazy to clean the house these Days, I'm surprised at myself! But have been doing other things - things that I love, so some consolation! Well, i have Always hated cleaning, though i like the house to be clean :D
 
And this poem i came across on FB a few Days perfectly describes me! And I seem to have taken it quite too seriously that the house was in a big mess. And I had to clean it lest we had to run away elsewhere!!
 
And so started the boring task of cleaning.... and after a couple of minutes I was hungry! Yeah... Another excuse, you say? Huh.... My Eyes went to the lone banana lying on the table and just as i was about to grab it and eat, my head started dreaming of a banana split icecream! Ahhh... I wanted it NOW!
 
But then i exercised some restraint to wait till i finished the cleaning before indulging in a plateful of sinful icecream. And it really worked! I finished the cleaning in the shortest possible time, took a shower in just a couple of minutes and ran to the kitchen to fix up that plate! Ahhh... miss the Corner House in namma Bengaluru.... This is no recipe as such, but a wonderful way to indulge!
 
 
In its classic form it is served in a long dish called a boat. A banana is cut in half lengthwise (hence the split) and laid in the dish. There are many variations, but the classic banana split is made with scoops of vanilla, chocolate and strawberry ice cream served in a row between the split banana. Pineapple topping is spooned over the strawberry ice cream, chocolate syrup over the vanilla, and strawberry topping over the chocolate. It is garnished with crushed nuts, whipped cream, and maraschino cherries [Wiki]
 
This is no recipe as such, but a wonderful way to indulge! Feel free to pair up any flavor of icecream that you like and any topping you fancy... and enjoy!

Banana Split

Ingredients:
(For one serving - Scale up as you wish)
One long banana
Scoops of ice Creams - Vanilla, Chocolate, Strawberry - I used Chocolate bits, Strawberry and vanilla
Toppings - Chocolate sauce, Strawberry sauce (I didn't have patience to make a chocolate sauce, so used nutella instead!)
Pineapple pieces - a few - i used mango instead
Chopped toasted nuts - Walnuts, cashews, peanuts if you fancy

Method:
  • Split the banana into two, lengthwise and Place on a serving platter
  • Scoop out one scoop of each icecream
  • Top it with one of the toppings on each of the icecream scoop
  • Sprinkle with the chopped nuts
  • Wait no longer to indulge!! Enjoy!!


Saturday, February 16, 2013

Haalbai - A healthy, irresistible sweet


Hello folks! Here I am after a break... just felt like taking off from blogging, so the absence. I am like that - just don't feel like doing certain things at times!!

Presenting here today is an authentic, South Karnataka sweet - Haalbai, which is almost fat free, healthy, melt in mouth, light and makes you crave for more! It is made of whole grains - wheat, rice or ragi. My favorite is the one with wheat, shown here. It requires soaking the grains and extracting milk from it. The milk extracted is then heated in a heavy bottomed vessel until it thickens to a halwa consistency. Then it is poured over a greased plate and cooled and cut into squares. Some people do use coconut milk also along with the extracted milk, but it is optional. Without the coconut milk, all the fat used is a teaspoon of ghee for greasing the plate!

Coming to the taste, it is a cross between halwa and may be burfi - though not exactly. It can be cut into any shape and retains its shape firmly, but at the same time it is soft with a melt in the mouth texture. It can be had at room temperature or cooled in the refrigerator and had. It's just irresistible!!

I had made these for last Deepavali, by myself, but never got to posting it till now. Let me warn you before hand it is definitely time consuming, but once you are done with it, its totally worth it! You'll be proud of yourself for trying it out!!


Here's how you make it...

Halbai

Preparation Time: ~1 hr
Cooking Time: ~ 1 hr


Ingredients:
  • Whole wheat grains - 1 cup 
  • Freshly grated coconut - 1 cup (optional – I did not use it)
  • Grated jaggery - 2 cup
  • Ghee – 1 tsp 
  • Cardamom powder - 1/2 tsp 
Method:
  • Clean and soak the wheat grains in water overnight or up to 12 hours
  • Grind the soaked wheat grains into a smooth paste using very little water & strain using a fine mesh or a muslin cloth.
  • Repeat the process twice & discard the residue
  • If using coconut, grind it along with the wheat
  • In a large heavy bottomed vessel, add the extracted milk, jaggery, and bring it to a boil
  • Add cardamom powder and bring to a gentle boil.
  • Keep on stirring till the whole mixture thickens. This should take about 45 minutes to an hour.
  • The mixture should leave the sides of the pan. When completely cooked, the mixture is non-sticky & gets a uniform gloss. 
  • Spread on a greased plate & allow it to cool. Once cool, cut into squares & serve
  • It should stay in the refrigerator for about a week.
Notes:
  • This proportion yields about one 10 inch plate of halbai, which can be cut into about 25 pieces
  • Before taking it off the pan, do a test. Take a tsp of the mixture & spread on a greased plate. It should be able to come off without sticking to the plate. This ensures that it is done.

Tuesday, November 13, 2012

Shankar PoLi / Shakkar Para


This is one easy and common sweet that I grew up with. Mom used to make these often for us kids, during festivals, during our holidays, for trips and so on. And most of the times we’d sit with her and help her with it. This is made by mixing a chapathi like dough, rolling it, cutting into diamond shapes and deep frying. 


Our part of the work would be cutting the rolled dough and lifting them off the rolling board… it was fun! And as soon as the fired ones are out of the oil, we’d let it cool a bit and pop them into our mouths, while helping for the next batch!


They are crispy, and the sprinkled sugar adds a nice taste. They do stay fresh for a couple of weeks, that is if we let them stay that long! Works well if you need something to make in a large scale as well.


So here’s Shankar Poli and wishing you all a
Happy Deepavali / Diwali!

Shankar PoLi / Shakkar Para

Ingredients:
All Purpose Flour / Maida - 2 cups
Hot oil / Ghee - 1-2 Tbsp
Sugar - 3 Tbsp
Salt - 1/4 - 1/2 tsp - I’d suggest not to skip this - Salt brings out the other tastes well
Oil for deep frying
Powdered sugar to sprinkle on top (optional)

Method:
  • Mix all the ingredients except the oil kept for deep frying, in a bowl.
  • Prepare a firm and tight dough with using water and keep aside for 10-15 mins
  • Divide the dough into 4 equal portions and roll out each portion by dusting very little flour thicker than a chapathi.
  • Cut the rolled out dough into small diamond shapes using a sharp knife or a pizza cutter.
  • Heat oil in a pan and deep fry the cut out dough in medium heat till golden brown.
  • Drain it on absorbent paper, and sprinkle with some powdered sugar. I used some vanilla sugar that I had.
  • Repeat with the rest of the dough.
  • Allow to cool and store in an air tight container.
  • It stays fresh for a couple of weeks 
Notes:
  • Addition of ghee/hot oil while making the dough gives the snack a crisp texture.
  • Can make a savory version of it too

Friday, April 8, 2011

Carrot Payasa / Kheer


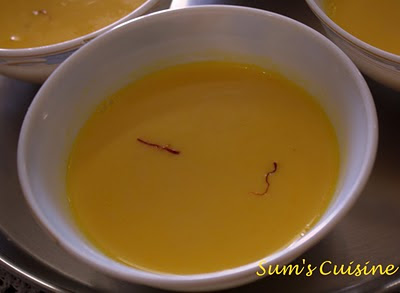
A special meal cannot be complete without a sweet. And to make it light and simple, what is better than a payasa or kheer? And especially if it involves fresh carrots as the main ingredients, no one can say no to it! Carrots make it as the best veggie to be used in sweets, due to their lovely sweet taste and flavor.

And this one is easy to prepare too... just a few minutes of preparation and out comes a lovely, colorful payasa. This one is my MIL’s recipe and I just love it....


Carrot Payasa

Preparation time : 10 min
Cooking time : 15 min
Serves : 5-6

Ingredients:
Carrots - 2, medium sized
Milk - ½ liter
Sugar - ½ to ¾ cup, adjust according to your taste
Ghee - 2 tsp
Raisins - 10 - 12
Cashews - 10 - 12
Almonds - 5-6
Saffron - a few strands

Method:
• Wash, peel and grate carrots; it can also be thinly sliced
• In a heavy bottomed pan, heat 1 tsp of ghee and add raisins and half the cashews; once done transfer it to a small bowl for garnishing later
• Add the remaining ghee and add sliced or grated carrots and sauté till soft. You can cover the lid, to speed up the process. But make sure it is not charred, by stirring it frequently
• Towards the end, add the almonds and the remaining cashews and sauté
• Once carrots are cooked soft, allow to cool and blend it to a puree in a blender; add milk if needed
• Meanwhile bring the milk to boil and once done, transfer the carrot puree and sir
• Add sugar and continue stirring till it starts boiling
• Garnish with the prepared cashews and raisins and a few saffron strands
• Serve hot, warm or chilled.

Tips n Tricks:
• If the puree is not smooth enough, strain it through a strainer before adding to the milk


Thursday, January 6, 2011

Carrot Halwa

Happy New Year, one and all..... May this year bring all your dreams come true and be as sweet as possible.

Had made this carrot halwa sometime back, but hadn’t posted it. Very simple to make, this is one all time favorite sweet.

Here’s the recipe...

Carrot Halwa

Preparation time : 15 min
Cooking time : 20-30 min
Serves : 5-6


Ingredients:
Carrot - 500 gm
Milk - ¾ cup
Sugar - 1 cup, adjust according to your taste
Ghee - 1 Tbsp
Raisins - 15 - 20
Cashews - 15 - 20
Khoya - ½ cup, optional


Method:
• Wash, peel and grate carrots
• In a heavy bottomed pan, heat 1 tbsp of ghee and add cashews and raisins
• Once done, add grated carrots and cook in milk till soft. You can cover the lid if using a pressure pan, to speed up the process. But make sure it is not overcooked
• Once cooked, add sugar and continue stirring
• Add remaining ghee to prevent sticking to the bottom

• If using khoya, add it and mix well
• Sauté for a few more minutes till the desired consistency is reached.

Tips n Tricks:

• Do not overcook the carrots
• The cashews and raisins can be toasted in ghee separately and added at the end, to retain their crunchiness


Sending this sweet and the rose to Create and Carve event

Thursday, November 18, 2010

Semiya/Shavige Kesaribath

Whenever mom felt like pampering me with some sweet quickly and immediately her choice would be this!! Be it in my college days when she felt like packing an extra box for me with some sweet dish or now when I give her a quick visit, her choice would be this. And I thoroughly enjoy this mom-made sweet anytime, and with or without anything else. One good thing about the Semiya kesari bath is that it takes much much lesser ghee when compared to its regular soji/rava counterpart. And it tastes good when cold too.
Here’s the recipe...
Semiya/Shavige Kesaribath

Preparation time : None
Cooking time : 10-12 min
Serves : 4

Ingredients:
Semiya - 1 cup
Milk - ¾ cup
Water - ¾ cup
Sugar - 2 Tbsp, adjust according to your taste
Ghee - 1 Tbsp
Raisins - 10 - 12
Cashews - 10 - 12
Saffron food color - a pinch

Method:
• Dry roast semiya in a heavy bottomed pan till light golden and transfer to a plate
• In the same pan bring milk and water to boil
• Once the milk starts boiling, add semiya into it and continue heat in medium to low flame
• Add a pinch of saffron color
• Stir gently in between, and allow for semiya to cook till done. This will take about 4-5 minutes. Do not overcook the semiya.
• Add more water if necessary, but ensure that the cooked semiya is fairly dry
• Now add sugar and stir gently. The mixture now becomes a little liquidy.
• Continue heating for another 2 minutes, put off the flame• In a small skillet, heat ghee and roast cashews and raisins till they turn golden
• Mix in the cashews and raisins and serve warm.

Tips n Tricks:
• Do not overcook the semiya

Monday, April 19, 2010

Rasmalai

Was I cribbing that I didn’t know how to make any sweet except ‘Semiya Payasa’ till some months back? Well, now I’m pleasantly surprised that I can make a number of sweets.... some of them being my all-time favorites like rasmalai!

I had assumed that these sweets are way too complicated for me to even try out... But I’m glad that I learnt and tried it out.... It’s not that complicated, just that it’s time-consuming. Anyway, most of the sweets are, so no big deal..... I was glad when milk got split one day, and googled the recipe and tried it out... it did turn out good....
Little niece Hima loved it so much that she just kept opening the refrigerator with a bowl and spoon in hand, demanding for more! And even after it got over, she kept on searching in the refrigerator if there is some more :)
Rasmalai

Preparation time : 15 min + waiting time of about half an hour
Cooking time : 45 min
Makes : 12-15

Ingredients:
Milk - 1½ lt
Lemon juice - 2 tsp
Cardamom powder - ½ tsp
Maida - 2 tsp
Sugar - 1½ cups
Food color - a pinch of yellow color
Saffron / Kumkum kesari - ½ tsp

For Garnishing:
Almond, pista flakes - ½ Tbsp

Method:
• Bring 1lt of milk to boil
• Add lemon juice and allow the milk to curdle
• Turn off heat and allow to cool slightly
• In a thin muslin cloth, strain the split milk and squeeze tightly so the liquid is removed. The semi solid part is called chenna
• Hang the chenna in the same cloth, with a heavy weight on it so that the remaining water content if any is removed
• After about 30 minutes, take the chenna in a bowl and add maida and mix
• Knead well for at least 10-15 minutes so that the mixture becomes a soft dough
• Meanwhile in a pan, boil 3 cups of water and add ½ cup sugar
• Make small ping pong sized balls out of the dough and press it slightly to flatten. See to it that there are no cracks
• Put these into the boiling water and let cook for at least 15 minutes. Ensure that these are well immersed in the water/syrup
• Meanwhile in a heavy bottomed pan, boil the remaining milk, continuously stirring
• The quantity of the milk should reduce to 2/3rds
• Add a pinch of food color and saffron
• Add remaining sugar and stir well till the sugar is dissolved
• Add the cooked rasmalais into the condensed milk and allow to cool
• Refrigerate and serve garnished with pista/almond flakes

Tips n Tricks:
• Knead the chenna with flour very well; else there would be cracks in the rasmalai
• Cook the chenna well in the sugar water, till they are puffed up

Wednesday, March 17, 2010

Bele Obbattu


This used to be my favorite sweet. Usually, the standard Ugadi menu includes mainly Bele Obbattu and mavinkai chitranna. But since my birthday comes about a month after Ugadi, mom used to make it for my birthday for me, rather than for Ugadi....

My liking towards this special sweet was so famous that our next door aunty would not miss sending me a couple of obbattu whenever she made them. And my friends would invite me home when their moms would prepare them. I’d shamelessly go to their place and hog and come back!
Of course this still is my favorite.... the lunch caterer at office gets very soft obbattu almost every Friday and I make it a point to have it at least one Friday a month....
Actually these pics were taken last year on Ugadi, but somehow I had not posted them. Another Ugadi went by and my long pending post of Bele Obbattu is finally out.... Anyways, better late than never.... BTW, wish you all a Happy New Year...
Bele Obbattu


Preparation time : 20 min
Cooking time : 30 + 30 min
Makes : 20 - 25

Ingredients:
For the Dough (kanaka):
Chiroti rava / Fine suji - 3/4 th cup
Maida/ All purpose flour - 1 cup
Oil - 1/2 cup
Water

For the Filling (Hoorna):
Tur dal - ¾th cup
Channa dal - 1 cup
Jaggery - 3 medium sized blocks / roughly 1¼th cup when powdered coarsely; adjust as per you sweet taste
Cardamom - 3-4

Other ingredients
Oil for brushing

Method:

For the Dough (kanaka):
• Mix sooji and maida well in a wide basin
• Add water and make a soft dough
• Mix in oil and knead well.
• Cover it and set aside for at least an hour

For the Filling (Hoorna):
• Wash and cook dal in a heavy bottomed vessel for about 15 minutes till cooked soft. Do not use pressure cooker as it gets mushy too soon.
• Drain off the water. This water can be used to prepare rasam, which we call obbattina saru.
• In the same heavy bottomed pan, start sautéing the cooked dal
• Add jaggery and crushed cardamom. When jaggery melts, the mixture becomes a little watery
• Continuously sauté it for at least 15-20 minutes on medium/low flame till the mixture is almost dry. Take care not to let the mixture stick to the bottom of the pan.
• Allow it to cool slightly; when warm, grind it to a smooth lump in a mixie or grinder. If you're using mixie, grind it in small batches as the lump gets stuck in the jar if more quantity is used at once. Keep aside to cool completely.
• You should get an almost dry, but with good binding consistency

Making Obbattu:
• After about an hour, the oil would be separated from the dough; Knead it again for at least 10 minutes, till the oil is absorbed
• Grease your palms with oil, take marble sized ball and flatten it on your palm, leaving it a little thicker in the middle than on sides
• Place a bigger ball (lemon sized) of the filling in the middle and cover it completely, by stretching the dough. The quantity of filling should be almost double that of the dough to get soft obbattu.
• Grease a thick polythene film or a plantain leaf with oil and pat the stuffed dough slightly
• Take another thinner polythene sheet and spread it over the stuffed dough
• With your palm, smear over the second sheet applying gentle pressure, flattening the dough. Do it gently seeing to it that the filling does not come out. Make circular motion ensuring it is flattened evenly.
• Heat a thick griddle and brush a little oil
• Remove the second plastic sheet and Place the thick sheet with patted dough facing over the hot griddle.
• After a few seconds, remove the sheet, leaving the obbattu on the griddle
• Lower the flame and turn around the obbattu. Cook till golden spots appear on either side. Be sure to handle it with care, as these are quite delicate
• Take it out from the griddle and cool it slightly if storing. Else serve it hot with a dollop of ghee.
• Repeat for the rest of the obbattu.

Tips n Tricks:
• Do not overcook the dal
• Sauté it till dry, else it will not be possible to get the right consistency

Variations:
• Dough can be made fully of maida instead of adding sooji


Monday, March 8, 2010

Pasta Payasa!

As I started making pasta in white sauce, my MIL started repeating that we could make payasa out of this pasta. Being a semiya payasa lover, I wanted to make it similar to semiya payasa. And off I started my experimentation. This helped me in making a second pasta dish for the event “Pasta Party”, hosted by Jyoti of 'Pasta Party' hosted by Jyoti of http://panchpakwan.blogspot.com/. Here it goes, for the event.
BTW, the payasa turned out to be quite good. And in spite of Dee being averse to payasas, he did have this and said it was good :)
Pasta Payasa

Preparation time : Nil
Cooking time : 15 min
Serves : 4

Ingredients:
Pasta - 2 handfuls / ¾ cup (I used small elbows; any other smaller variety will also do)
Milk - 2 ½ cups
Sugar - 2 Tbsp, adjust according to your taste
Ghee - 1 tsp
Raisins - 10 - 12
Cashews - 10 - 12

Method:
• Bring milk to boil in a heavy bottomed pan
• Once the milk starts boiling, add pasta into it and continue heat in medium to low flame
• Stir gently in between, and allow for pasta to cook till done. This will take about 5-7 minutes. Do not overcook the pasta
• Add sugar and stir gently
• Continue boiling for another 2 minutes. When sugar is dissolved and milk starts thickening to kheer consistency, put off the flame
• In a small skillet, heat ghee and roast cashews and raisins till they turn golden
• Mix in the cashews and raisins and serve warm or cooled.

Tips n Tricks:
• Do not overcook the pasta

Variations:
• A tsp of Badam powder can be added to give a richer taste

Tuesday, November 10, 2009

Badam Puri - A layered, soft-yet-crispy sweet


At lunch table, when we were discussing about what sweet dish to prepare for Deepavali, someone suggested Badam Puri. And immediately the memories of my first birthday after marriage came up. MIL had prepared a very tasty meal of Peas Pulav and Badam Puris for me. I had happily hogged all that I could.

I remembered that and decided that Badam Puri would be the sweet for one of the days of Deepavali. I just couldn’t resist my temptation to have those slightly crisp, golden colored, sugar coated melting sweet, but I had no choice but to wait till the festival. This sweet is generally made in weddings, but I bet home-made version cannot just beat the taste and is also healthier, mainly because we use ghee at home instead of vanaspathi (dalda).
I learnt making it from my MIL, and it did come out very well.
Here’s the recipe...
Badam Puri

Preparation time : 20 min
Cooking time : 20-25 min
Makes : ~20

Ingredients:
All Purpose Flour (Maida) – 2 Cups
Ghee – 1 ½ Tbsp
Baking Powder – ½ teaspoon, optional
Food color – 1 pinch/drop, preferably saffron or yellow
Salt – a small pinch
Cooking oil for deep frying
Water

For Sugar Syrup:
Sugar – 1 Cup
Water 1 Cup

Method:
Dough:
• In a bowl, add ghee, baking powder, salt and food color and beat it for 5-10 minutes continuously with your fingers
• Once the ghee forms a very smooth paste, add flour and mix thoroughly
• Add a little water and form a soft dough, neither too tight nor too loose
• Knead the dough for at least 8-10 minutes ensuring there are no cracks in it
Sugar Syrup:
• Meanwhile in another vessel mix water and sugar and boil it
• Food essence may be optionally added for enhanced aroma
• A pinch of color can be added as well for attractive color
Badam Puris:
• Now make small TT-ball sized balls out of the dough
• Roll out puris of about 4” diameter
• Fold it first into half and then again, making it 4 layered
• Slightly press it, using the rolling pin so that the layers are held closely
• Heat oil in a frying pan and fry these rolled and folded puris one by one in medium low flame till golden brown. The puris puff up and increase in size when fried.
• Drain excess oil by spreading it on a kitchen towel / tissue
• Drop the puris one by one as they are fried into the sugar syrup prepared
• After 5-6 minutes take out the sugar soaked puris from the syrup, in the order that they were dipped, and spread them out on a dry plate.
• The coated syrup is absorbed and the Badam-puris become dry in sometime
Serve it immediately when still hot or after cooling

Tips n Tricks:
• Knead the dough enough to get a uniform texture
• The sugar syrup should be thicker than that for Gulab Jamuns, so that the puris do retain crispiness, yet absorb the sweetness
• Do not wait for too long after the syrup is made, as the syrup starts solidifying when cooled

Sunday, August 16, 2009

Jackfruit Halwa

More than two years into proper cooking and still I hadn’t tried out any sweet. Except for often making my favorite semiya payasa and jamoon using ready mix; and also being an assistant in making some other complex sweets. With the sweet tooth or teeth that I have, I started wondering why I hadn’t yet experimented with any sweet myself. May be because the folks at home do not like sweets as much as I do, or are not supposed to eat them. But how do I resist my temptation for a sweet....

One day at lunch table, while having nice and ripe jackfruit, V suggested a recipe of halwa out of jackfruit! ‘It’ll be heavenly’, was how she described her dish. I was initially apprehensive to try ANYTHING out of this wonderful fruit - because I simply love eating it and eating it as it is! Anyway, the recipe had been noted in my mind.

Coincidently, the same evening, there were guests at home for dinner, and I had to make some sweet for the dinner. So I just ventured out to try this newly learnt sweet, and it did take longer than I had expected. But I sure was worth the time spent, as it came out pretty nice. And the guests openly appreciated my halwa, and honored it by helping themselves with serving after serving, till the bowl was cleaned out! Even Dee who refuses any sweet did have it and compliment on it!

Now I make sure that I prepare this halwa every time we get home a jackfruit. I take out and save up a portion of the fruit for halwa before we start attacking the fruit from all directions to have our shares of the fruit.
Jackfruit Halwa


Preparation time : 10 min
Cooking time : 25-30 min
Serves : 4-5

Ingredients:
Jackfruit deseeded - 2 cups
Sugar - ¾ - 1 cup
Ghee - 2 tbsp
Cashew nuts - 12-15

Method:
• Chop jackfruit into 1” pieces
• Grind it into a paste in a mixie / food processor, without adding any extra water
• In a thick bottomed pan, heat 2 tsp oil and fry the cashew nuts till golden brown, take out from ghee and keep aside till needed
• Pour the remaining ghee into the pan and add the ground jackfruit paste
• Mix in sugar and stir continuously for 15 minutes on low to medium flame
• The ghee starts to separate out from the halwa when it is done
• Switch off the flame and pour out the extra ghee separated out
• Decorate with the fried cashews, serve hot or cold


Variations:
• Sugar can be substituted with jaggery
• Mashed banana can also be added

Wednesday, April 22, 2009

Mango Mania : Seekarane - A sweet mango relish

What’s the best thing about Summer? Other than summer holidays for kids, is it not mangoes that make summer a special season?
Summers are made special starting from the tangy, sour, raw mangoes of various varieties, to the ripe, juicy, sweet mangoes. With all the health benefits added to it, it surely deserves to be called the King of Fruits. It sure is a comfort food. Mangoes really can make one feel better! The heat of summer can be forgotten momentarily when having mangoes - be it the raw ones with salt and chili powder, or ripe and juicy ones, or any dish prepared from it!
There are many many regional cuisines prepared using this King of Fruits. Each has its own uniqueness and specialty. And the best part of it is that it makes you crave for more! So why not dedicate a special series for this king of fruits?
Let’s start with Seekarane - a Karnataka specialty using ripe mangoes, which can be had as an accompaniment with chapathi / poori / dosa, or just as a dessert. It’s a simple and easy recipe, with very few ingredients but still makes you feel great after having a bowl of it.
At home, it’s usually my FIL (yes, you read it right!) who makes it. He is very fond of this fruit and usually chops the fruits and makes it ready, and all of us savor it!

Here's how you make it.......

Mango Seekarane


Preparation time : 15 min
Cooking time : Nil
Serves : 4-5

Ingredients:
Mangoes - 3-4 medium sized, any variety
Bananas - 1-2, preferably elakki variety
Milk - 1 cup, chilled
Sugar - 1-2 Tbsp, depending on whether the mangoes are sweet or sour
Honey - 1 Tbsp, optional
Cardamom - 3-4

Method:
• Peel and cut the mangoes into ½ inch pieces
• Scrape out the pulp and juice sticking to the seed
• Cut bananas into small pieces and mix with the mango pieces and pulp
• Add milk, sugar and/or honey
• Crush the cardamoms and add
• Mix thoroughly
• Pour into small bowls and refrigerate if needed
• Serve as dessert, or as accompaniment with chapathis/pooris/dosas

Tips n Tricks:
• Adjust the quantity of sugar / honey based on how sweet / sour the mangoes are

Variations:
• Sugar or honey can both be added or one of them can be chosen - both give different tastes
• Bananas can be omitted


Mango-facts:
• The mango is indigenous to the Indian Subcontinent especially India, Pakistan, Bangladesh, and Southeast Asia
• The name mango is ultimately from the Tamil mangai and was loaned into Portuguese in the early 16th century as manga, from where the Portuguese passed into English.
• Mangoes account for approximately fifty percent of all tropical fruits produced worldwide.
• India is the largest producer of Mangoes
• Alphonso, grown exclusively in the Konkan region of Maharashtra, which is considered among the best mangoes in the Southern states of India is named after Afonso De Albuquerque who reputedly brought the fruit on his journeys to Goa
• Mango is rich in a variety of phytochemicals and nutrients that qualify it as a model "superfruit", a term used to highlight potential health value of certain edible fruits.
• Mangoes are an excellent source of Vitamins A and C, as well as a good source of Potassium and contain beta carotene.
• Mangoes are high in fiber, but low in calories (approx. 110 per average sized mango), fat (only 1 gram) and sodium.
Source of facts: http://www.freshmangos.com/, http://en.wikipedia.org/wiki/Mango