Showing posts with label Indian Breads. Show all posts

Monday, June 9, 2014

Rave Rotti / Semolina Flatbread


People have started asking me now, how I get the time to try many cooking and baking recipes and even blog about them, with an almost 8-month old. Well, I guess if one wants to do something, one figures out a way to! I tell them I get more time now, than when I did with him in my tummy!! Being the footballer he is, he'd kick every food that went into my tummy and I'd throw up almost every meal! Which left me with not much of an appetite to eat or cook! Seems so funny now, to look back... how I hated cooking or anything to do with food, except occasionally enjoying eating out. The interesting meals that D or Amma churned out frequently, tailored to suit my changed taste buds, the super sensitive nose, changed tummy capacity, with reduced spice levels would please me only occasionally... and then there was this question of whether the little fellow inside would decide to not it kick out!! So as a result of all these the blog suffered inactivity too.


And now, with my lil one being fond of watching me cook, right from the time he's 2 months old, I am loving to churn out different things - cooking and baking. He loves to sit in his little chair, earlier in his bouncing chair, watching me talk, and sing and cook or bake. I hand him a light weight, baby safe cutlery or a colorful wrapper or something that keeps him occupied for a few minutes and quickly dish out something. Most of the times, I had not been able to feed the little one what I cook as he was too small, but now, I guess I can start giving him a taste of many of the delicious stuff that i prepare.   


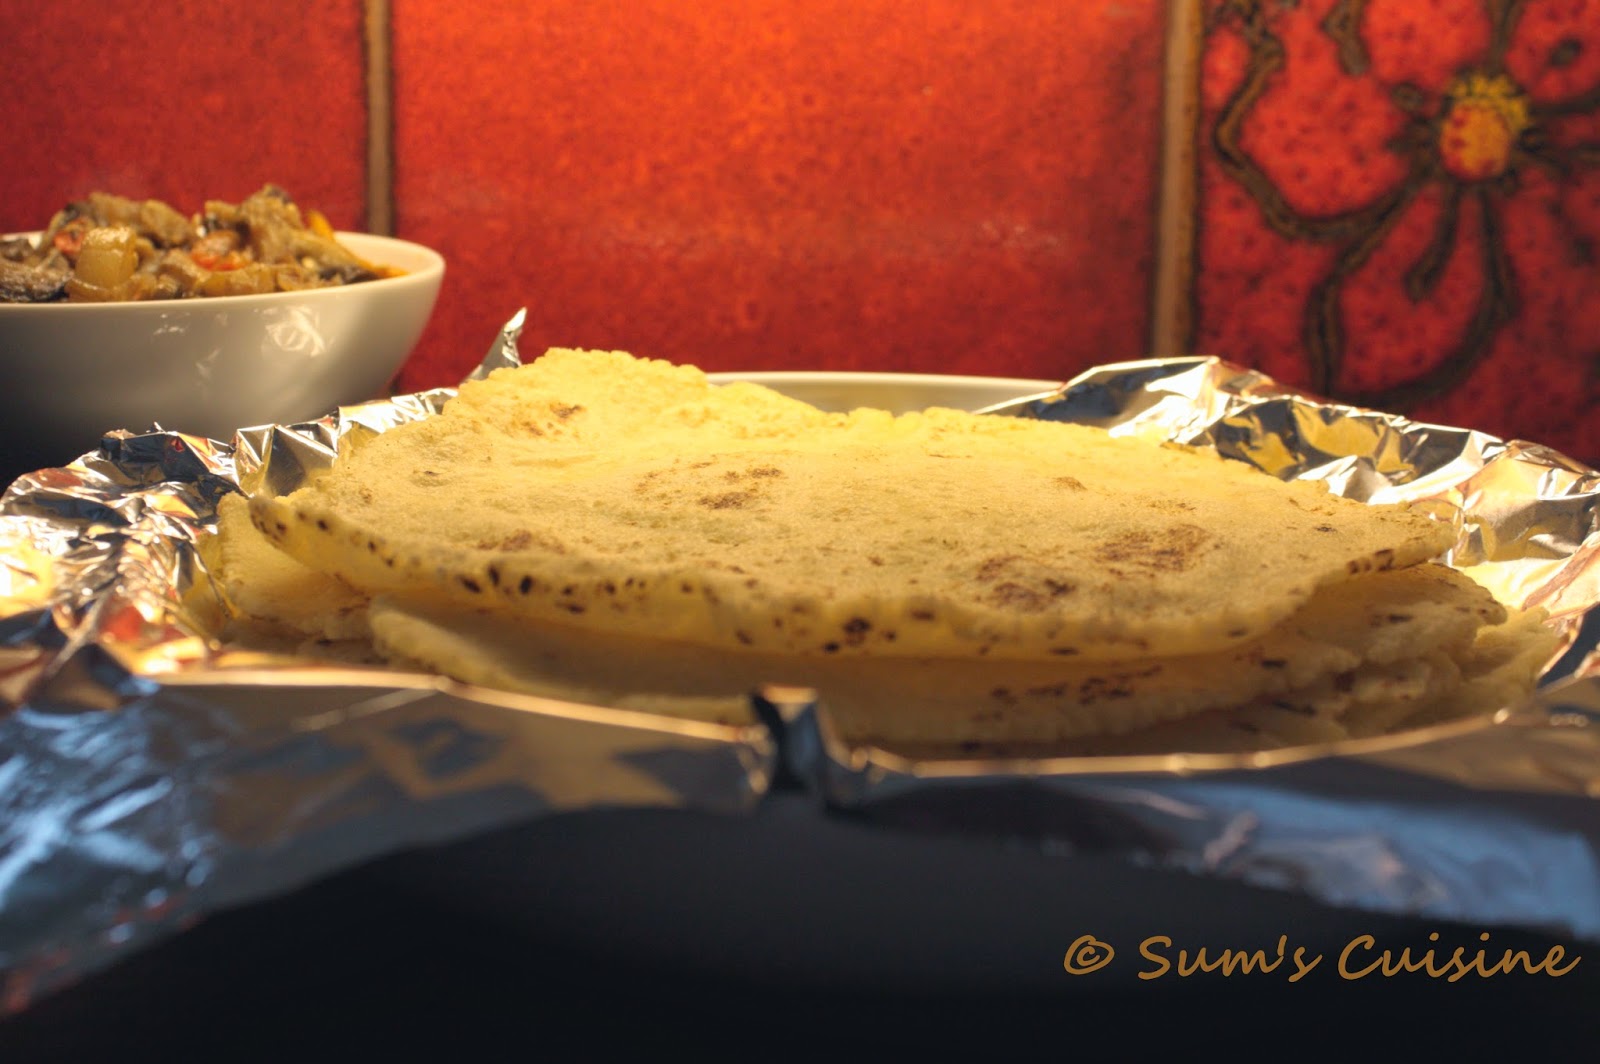
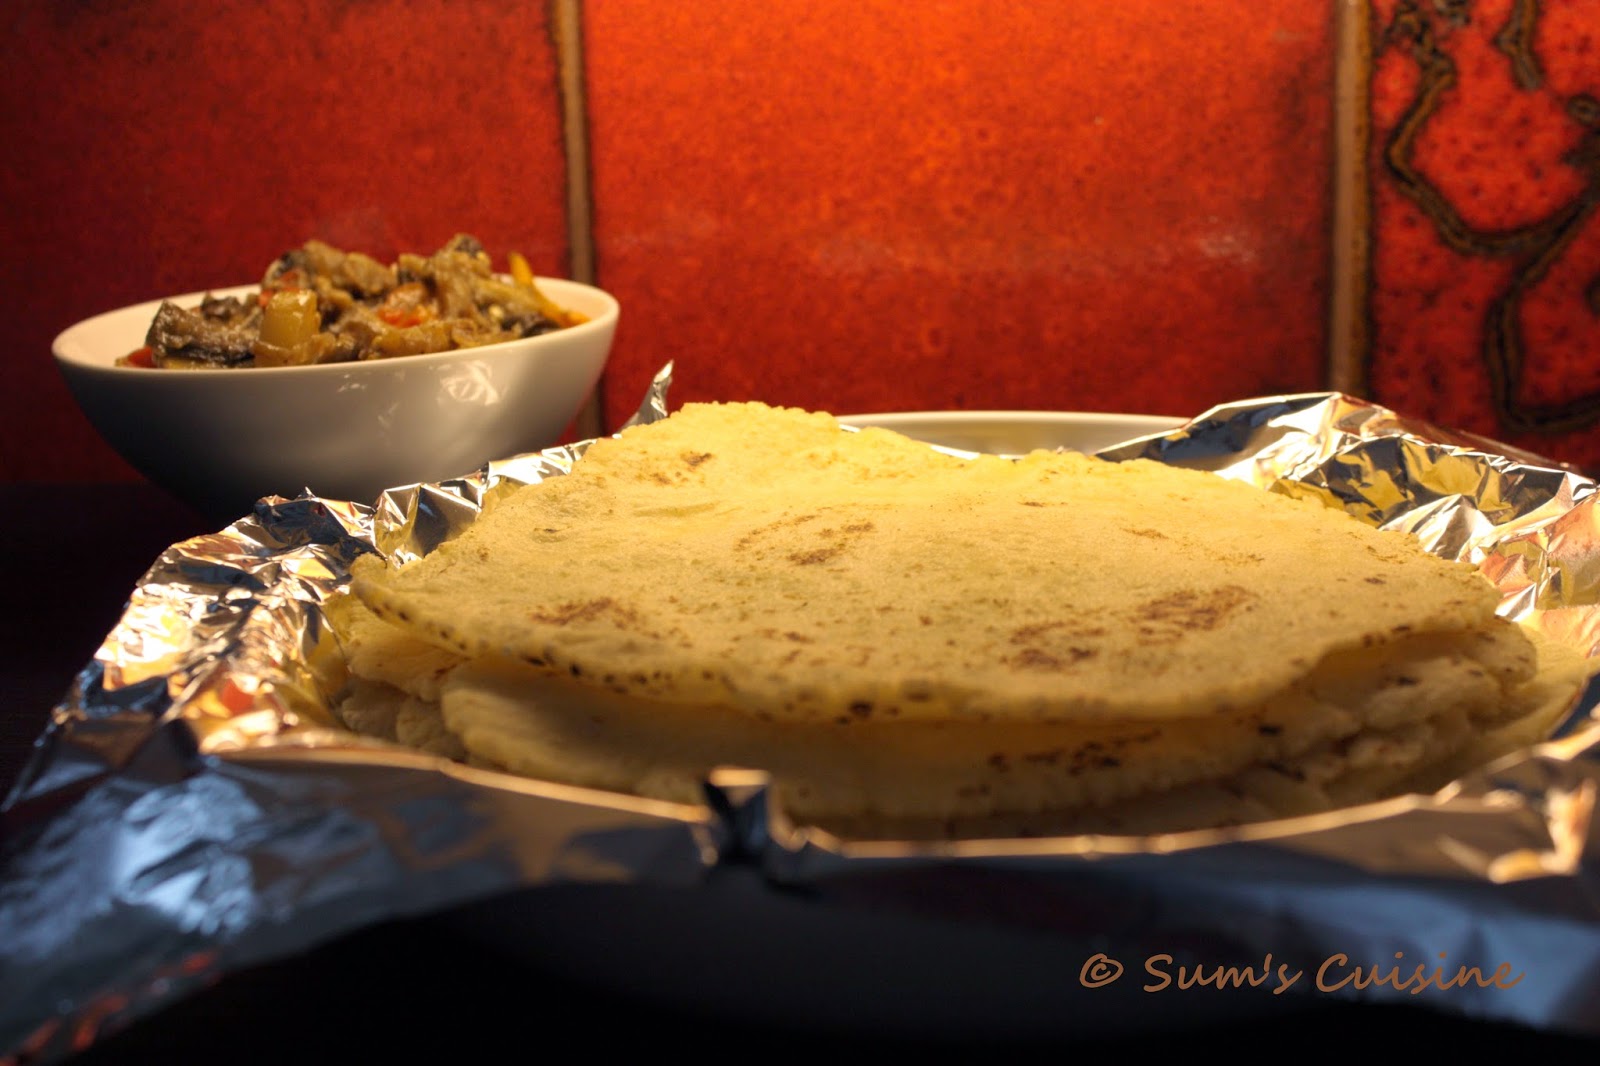
So, coming to the recipe of this post, these are rottis/flatbread made of fine semolina. The semolina is cooked first in water and then, kneaded when still warm and rolled to rotis and cooked on a skillet. It does not require any oil for cooking except for a few drops that are used for kneading the dough. The resulting rotti is soft, almost melt in the mouth, that goes along well with many curries and gravies. It is similar to the Ubbu rotti prepared with rice flour but a bit easier that them for kneading and rolling. 


Well, don't get scared to attempt these reading the steps, it is not very difficult than making normal chapathis/roties... just a step or two more... But the result will be totally worth it.... So here's how we make it....   

Rave Rotti / Sooji Roti / Semolina Flatbread

Preparation time : 15 min 
Cooking time : 5 min for the dough and 2 min for each rotti 
Makes : 10-12

Ingredients:
Fine Semolina (Chiroti rava/sooji) - 2 cups 
Maida / Whole wheat flour - for dusting
Water - 2 cups (This usually works fine but you'll know the exact amount required for your sooji after one trial)
Salt - ½ tsp, or as per taste
Cooking Oil - 2 tsp

Method:
  • In a heavy bottomed pan, boil water by adding salt and a few drops of oil
  • Once water starts boiling, add semolina and let it remain for 4-5 minutes on medium low flame
  • At the end of it, take a strong ladle and continuously stir, avoiding lumps. A wooden one works better
  • Turn off the heat and continue mixing as much as possible. The resulting dough should be similar to that of papad dough - soft, but non sticky
  • Let it cool for a couple of minutes so that it can be handled
  • Divide the dough into 3-4 parts and knead it well, smearing a few drops of oil. See notes below for easier ways.
  • Once the dough is kneaded well into a soft but firm dough, take small lemon sized balls and roll it using rolling pin like a chapatti/roti. Use a little amount of maida or atta for dusting.
  • Heat a griddle on high flame and cook the rolled rotti on both sides by flipping. Ensure not to brown the rotti. Appearance of light brownish spots indicates that it is done.
  • Repeat the same with rest of the dough
  • Serve hot with some palya/gojju/chutney
Notes:
  • To avoid your palms getting burnt while kneading the hot dough, fill it in thick polythene and cover it in a towel / thick cloth and knead it over it. This way a smooth and soft dough will be ready in a jiffy
  • Knead it, make into balls before you start rolling. This saves time and effort, and it gets easier to roll and then cook simultaneously. Or you can roll all of them first and then cook them one after the other. To stack up the rolled rotis make sure you've dusted them well, to prevent sticking to each other 
  • The better you knead, the easier it is to roll. If the dough is not kneaded well, while rolling the rottis start cracking and gets difficult to handle

Monday, September 19, 2011

Jolada Rotti - Jowar Roti

Jolada rotti or rotis made of jowar flour is a famous staple of northern Karnataka and parts of Maharashtra. In northern parts of Karnataka, it is typically served with spicy side dishes, the most famous being Ennegai - a spicy curry of stuffed eggplants, and a dollop of butter.

Here in Bangalore, we get the best jolada rotti in Kamat chain of hotels, where they have unlimited meals - Jolada rotti oota. The waiters keep serving you hot rotis one after the other, served along with many mouth watering side dishes, including the famous ennegai and you keep on hogging one after the other! In some of the outlets, they also have live Carnatic music played softly alongside, making the food even more pleasurable.
Traditionally, jolada rotti is rolled by patting the dough with just fingers/palm, without using rolling pin, turning the roti in a circular motion, thus increasing the size and making thinner. Yes, it does require special skills for that and is labor intensive - at least, we, with little experience in that feel so! So we adopt an easier, method for making these rotis, using a rolling pin, just as we roll parathas/chapathis. It does come out equally good with lesser effort!

Here’s how we make it...

Makes : 8-10

Ingredients:
Jowar flour - 2 cups + for dusting
Water - 3 cups
Salt - ½ tsp, or as per taste
Cooking Oil - 2 tsp

Method:
• In a heavy bottomed pan, boil water by adding salt and a few drops of oil
• Once water starts boiling, add jowar flour and let it remain for 3-4 minutes on medium low flame
• At the end of 3-4 minutes, take off from heat and using a strong ladle continuously stir, avoiding lumps
• The resulting dough should be similar to that of papad dough - soft, but non sticky
• When slightly cool to handle, divide the dough into 3-4 parts and knead it well, smearing a few drops of oil. See tips and tricks below for easier ways.
• Once the dough is kneaded well into a soft but firm dough, take big lime sized balls and roll it using rolling pin like a chapatti/roti. Use a little amount of jowar flour
• You can roll all the rotis and stack then one on top of the other. It doesn’t stick to each other
• Heat a griddle on high flame and put one roti at a time. After a few seconds, brush the top of the roti with some water using a pastry brush or clean cotton cloth dipped in water. This avoids the rotis from becoming too dry
• Flip it and repeat for the other side
• Cook it till small light brownish spots appear.
• Repeat the same with rest of the dough
• Serve hot with some butter or ghee and a spicy curry, preferably Ennegai (A stuffed eggplant curry)

Notes:
• To avoid your palms getting burnt while kneading the hot dough, fill it in thick polythene and cover it in a towel / thick cloth and knead it over it. This way a smooth and soft dough will be ready in a jiffy
• It is easy to knead the dough when hot rather than juggling it when it gets colder
• Knead it, make into balls before you start rolling. This saves time and effort, and it gets easier to roll and then cook simultaneously
• The better you knead, the easier it is to roll. If the dough is not kneaded well, while rolling the rottis start cracking and gets difficult to handle
• While rolling, if the edges crack, smoothen the edges with finger tips and continue rolling to get smoother edges

Coming up soon - Ennegai - the 'made in heaven' combination for Jolada rotti... Stay tuned!


Thursday, August 25, 2011

Vegetable Chapathi

There is always a quest to cook healthier and more and more nutritious food. Even when we’re pressed for time or don’t have much energy to cook, we still want to do whatever we can, to make the food we eat healthier, don’t we?
This was one such attempt to make a more nutritious variant of the usual plain and boring chapathis, by including loads of veggies, and some spices. The not so interesting veggies and plain and boring chapathis combine to give a tasty, inviting and nutritious meal. This can be had as is with some pickle or can combine with a healthy side dish; or as I did, you can make another healthy side dish of sprouted moong (recipe will follow soon). And enjoy a tasty and healthy meal.... The pics don’t do any justice at all, as I clicked them in a hurry and in artificial light, so sorry about that.
Preparation time : 15 min
Cooking time : 2 min per chapathi
Makes : 8-10

Ingredients:
Wheat flour / Atta - 2 cups
Grated vegetables - about 2 cups - Can use grated carrots, chayote, any other gourd that can be grated
Chopped coriander leaves - a Tbsp
Garam masala - ½ tsp
Red chili powder - ½ tsp
Salt - ½ tsp, or as per taste
Water as needed
Cooking Oil - 1 Tbsp + 1 tsp per chapathi

Method:
• Mix wheat flour, salt, chili powder, garam masala powder in a large bowl
• Add the grated vegetables and chopped coriander and mix in oil
• Slowly add very little water and knead into a tight dough
• The vegetables generally leave out moisture so make sure you do not ad too much water
• Coat it with a little oil and keep aside for half an hour
• Take the dough and pinch out lime sized balls
• Roll into thin chapathis using enough flour for dusting
• Heat a skillet and cook on both sides drizzling a few drops of oil on each side. Remove when small brown spots start appearing
• Repeat with the entire dough
• Serve hot with a gravy as side dish

Notes:
• Making very big chapathis out of this is difficult because of the addition of veggies - so a lime sized ball should be enough to make a 6” chapathi
• Be sure not to add too much water, which would turn the dough soggy


Tuesday, March 29, 2011

Methi Chapathi

When you want a twist to your usual plain chapathis, you should try this. Adding methi and some spices to the chapathis makes it totally different and so flavorful.... The monotonous flat bread is gone and is replaced by something special... accompanied by a nice gravy, it makes for a special meal....
Here is how to make Methi Chapathis...


Methi Chapathi

Preparation time : 15 min Cooking time : 2 min per chapathi
Makes : 8-10
Ingredients:
Wheat flour / Atta - 2 cups
Methi/Fenugreek leaves - 1 medium sized bunch or 2 small bunches
Garam masala - ½ tsp
Red chili powder - ½ tsp
Salt - ½ tsp, or as per taste
White sesame seeds - 2 tsp
Water as needed
Cooking Oil - 1 Tbsp + 1 tsp per chapathi

Method:
• Pick, wash and chop methi leaves finely
• Mix wheat flour, salt, chili powder, garam masala powder in a large bowl
• Add the methi leaves and mix in oil
• Slowly add water and knead into a soft dough
• Coat it with a little oil and keep aside for half an hour
• Take the dough and pinch out lemon sized balls
• Roll into thin chapathis and sprinkle methi seed on top. Roll again slightly so that the seeds stick to the rolled dough
• Heat a skillet and cook on both sides drizzling a few drops of oil on each side. Remove when small brown spots start appearing
• Repeat with the entire dough
• Serve hot with one of the below lip smacking gravy as side dish

Tips n Tricks:
• Making very big chapathis out of this is difficult because of the addition of methi - so a lemon sized ball should be enough to make a 6” chapathi

Tuesday, September 21, 2010

Ubbu Rotti - Rice flour roties

Where was I all these days? Well I was right at home and at office but too tied up with lots of work and expectations. Well, the last month - Shravana masa as we call it will generally be quite hectic with me, with all those poojas and festivals. Though there were quite many special dishes cooked, I didn’t have any energy or enthu to click and blog. So just stayed back from blogging. Now here I am, back in full swing!
Coming to today’s dish, we have what we call Ubbu rotti - a roti made of rice flour, which just puffs up like poori when making, and is very soft and melts in your mouth. Not very difficult to make, though requires a little more time than the usual chapathis or so, but its really worth a try.This tastes great with some chutney, vegetable palya, esp any side dish made of brinjal/eggplant. The side dish recipe will soon follow.

Ubbu Rotti


Preparation time : 20 min
Cooking time : 20 min
Makes : 8-10

Ingredients:
Rice flour - 1 ½ cups + for dusting
Water - 3 cups
Salt - ½ tsp, or as per taste
Cooking Oil - 2 tsp

Method:
• In a heavy bottomed pan, boil water by adding salt and a few drops of oil
• Once water starts boiling, add rice flour and let it remain for 10 minutes on medium low flame
• At the end of 10 minutes, take a strong ladle and continuously stir, avoiding lumps
• Cook for a couple of minutes more. The resulting dough should be similar to that of papad dough - soft, but non sticky
• Let it cool for a couple of minutes so that it can be handled
• Divide the dough into 3-4 parts and knead it well, smearing a few drops of oil. See tips and tricks below for easier ways.
• Once the dough is kneaded well into a soft but firm dough, take big small lemon sized balls and roll it using rolling pin like a chapatti/roti. Use a little amount of rice flour if it feels sticky
• Heat a griddle on high flame and cook the rolled rotti on both sides by flipping. Ensure not to brown the rotti. Appearance of light brownish spots indicates that it is done.
• Repeat the same with rest of the dough
• Serve hot with some palya/gojju/chutney

Tips n Tricks:
• To avoid your palms getting burnt while kneading the hot dough, fill it in thick polythene and cover it in a towel / thick cloth and knead it over it. This way a smooth and soft dough will be ready in a jiffy
• It is easy to knead the dough when hot rather than juggling it when it gets colder
• Knead it, make into balls before you start rolling. This saves time and effort, and it gets easier to roll and then cook simultaneously
• The better you knead, the easier it is to roll. If the dough is not kneaded well, while rolling the rottis start cracking and gets difficult to handle

Variations:
• The same can be prepared with fine soji or maida instead of rice flour. But the one with rice flour is a far healthier one.

Saturday, July 3, 2010

Aloo Paratha - South Indianised!

Are we all not so accustomed with tastes that are native to us? Whenever we learn something new from some other place, we make sure that we tweak it to suit our tastes... this is especially true with elders who are so used to their taste familiar to them. They find it hard to get used to some new taste.....

A similar situation has given rise to this South-Inidianised form of parathas! My inlaws, esp my MIL, likes her south Indian form of cooking with lot of coconut and stuff, rather than garam masalas, ginger garlic pastes and so on! And since we all love parathas, and she too wants to have it but in her form, she has tweaked it so much that it hardly resembles the actual paratha in taste, except that it has stuffing of aloo in atta dough! She uses the famous south Indian aloo palya - that we serve with Masala dosa, to make these parathas. And the accompaniment here is the very familiar coconut chutney, and not pickle and curd.

However, I must confess this is a great weekend breakfast item that we all drool over. It is worth a try, if you want variety in your usual parathas....
Here’s her recipe....

Aloo Paratha - South Indianised!

Preparation time : 20 min
Cooking time : 15 min
Serves : 5-6

Ingredients:
For the stuffing:
Potatoes - 4-5 medium sized
Onions - 3-4, medium sized
Oil - 2-3 tsp
Mustard seeds - 1 tsp
Urad dal - 1 tsp
Green chilies - 3-4, depending on taste
Curry leaves - 2-3 sprigs, leaves chopped
Coriander leaves - 2-3 sprigs, chopped
Turmeric - a pinch
Salt to taste

For parathas:
Atta / Wheat flour - 3-4 cups + more for dusting
Salt to taste
Water to knead the dough
Oil - for smearing on the parathas

Method:
For the stuffing:
• Cook potatoes in a pressure cooker till done
• Peel and mash roughly
• Meanwhile chop onions finely, slit green chilies
• In a pan, heat oil, add mustard seed and allow to splutter
• Once done, add the urad dal, curry leaves, green chilies and sauté till done
• Add chopped onions and stir till translucent. Add turmeric.
• Once onions are done, add roughly mashed potatoes, salt and chopped coriander
• Mix well, and sauté for a couple of minutes
• The stuffing is ready. Allow to cool for some time
• One cool, make small lemon sized balls

For parathas:
• Knead the flour and salt into soft dough using required amount of water.
• Allow to stand for 15-30 minutes
• Make lemon sized balls of the dough
• Roll it into a 3 inch circle, with the middle thicker than the edge
• Place the stuffing ball into the middle and cover the edges evenly and pat the ball flat
• Roll it using a rolling pin dusting with atta, ensuring the stuffing does not come out. Do it very gently.
• Heat a tawa and cook the paratha well on both sides, smearing teaspoon of oil for each till brown spots appear.
• Repeat for the remaining dough and filling
• Serve hot with a dollop of butter and some coconut chutney. Onion-coconut chutney tastes best with this version of parathas.

Tips n Tricks:
• Knead the dough to be soft, if it is too tight rolling parathas will be difficult.
• Roll gently to avoid the filling to ooze out
• Mash the boiled potatoes so that there are no lumps, which otherwise will be hurdles while rolling