Showing posts with label Authentic Karnataka Cuisine. Show all posts

Wednesday, November 19, 2014

Oats Bisi Bele Bhath


The thing about South Indian cuisine apart from being extremely tasty is that they are mostly full of rice-based dishes. And being more health conscious now, I try to replicate the popular dishes with something healthy. In some cases it is replacing rice with oats or wheat. Here I tried out making Bisi Bele Bhath with oats instead of rice and the results were quite satisfactory.


Bisi bele bhath is a famous rice-based dish Karnataka. Bisi-bele-bhath translates to hot-lentil-rice in the Kannada language. It is also known as Bisi bele huliyanna. The preparation of this dish is quite elaborate, involving preparation of spice powder. The spices used, contribute to the unique flavor and taste of this dish. It is served hot along with boondi or potato chips.


So here's our Oats BBB, in fact simpler to make than the traditional one...

Oats Bisi Bele Bhath

Preparation time : 15 min
Cooking time : 25 min
Serves : 4

Ingredients:
Oats - 1 cup (I used rolled oats)
Tur Dal - 1 ½ cups
Chopped Vegetables (Beans, Carrot, Potato, Onion, peas) - together 2 cups, all chopped into ½” pcs
Salt - 1 tsp
Coconut - 1 ½ Tbsp, grated - fresh or dry
Tamarind pulp - 1 Tbsp, adjust acc to taste
Jaggery - 1 big marble sized ball
Oil - ½ Tbsp
Butter - 1 Tbsp, optional
Turmeric - 1 pinch
Salt - 1 tsp, adjust acc to taste
Bisi Bele Bhath powder – 3 Tbsp (1 §)

For the powder:
Chana dal - 2 tsp
Urad dal - 2 tsp
Dry red chilies - 8-10
Cinnamon - 1” stick
Coriander seeds - 2 tsp
Cloves - 5-6
Maratha Moggu - 2
Cardamon - 2
Poppy seeds - 2 tsp
Curry leaves - 2 sprigs

For tempering:Cooking oil - 1 tbsp
Mustard seeds - 1 tsp
Groundnut seeds - 1 tbsp
Curry leaves - 2-3 strands
Red chilies - 1
Turmeric - 1 pinch

Method:
For BBB powder:
  • Dry roast all the ingredients
  • Allow to cool for 5 minutes
  • Grind them into slightly coarse powder
  • This can be made in larger quantity and preserved for a couple of months
Bisi Bele Bath:
  • Pressure cook dal and vegetables with a pinch of turmeric in sufficient water
  • Add tamarind pulp, salt, jaggery, BBB powder and bring to boil
  • Add oats and continue cooking for 5-6 minutes till the oats are cooked well. Add more water as needed. Oats absorbs more water so make it runnier than you like the bisi bele bhath to be.
  • Add grated coconut and mix thoroughly
  • Turn off the flame and add butter and mix
Tempering:
  • Heat oil in a pan
  • Add mustard seeds and allow to sputter
  • Turn the heat low, add groundnut seeds, and stir
  • After the groundnuts are half-done, add curry leaves and red chili pieces and stir for half a minute till all the ingredients are properly roasted. Keep aside till needed
  • Mix the tempering to the BBB just before serving to retain the crispness of the groundnuts
Notes:
  • Make the BBB a very watery with oats. It absorbs the water and gets thickened after sometime.
  • An onion can be sautéed and added along with the tempering

Monday, June 16, 2014

Baby Food: Ragi Sari - Multi grain Malt


Here comes the next variety of infant malt, again prepared by mom. This is a combination of ragi (finger millet), wheat, rice and green gram. All the grains are sprouted, dried, and then ground. We did not sieve it, as we wanted some texture to remain, making Adu go one step further from very smooth porridge. However it is fine enough to feed a 6 month old.


I introduced this to him after 3 weeks of starting on solids, after the first plain ragi malt was finished. He did take moderately well to this, though not as much as the former one. I realised it was probably because of the weird flavour that green gram added to the malt. I tried by cooking it for longer, and the green gram flavour subsided considerably. He then started enjoying it.


Now, after he is 8 months old, I've been giving him a lot of semi solids and a few soft dosas and other stuff, but this ragi malt also features in his diet quite regularly, which he enjoys. Having a tin of home made malt comes in really handy at times, when the kiddo is bored of other stuff, or you want to mix and match and experiment (More about the experiments later)

So here goes the recipe...

Ragi Sari / Nutritious Multi-grain Malt

Ingredients:
Ragi - 1 kg
Wheat - 200 g
Green gram - 200 g
Rice - 200 g

Method:
  • Soak ragi, wheat and green gram separately for 6 - 8 hours.
  • Drain the grains and tie them separately in a clean muslin cloth for germination.
  • Green gram will germinate in 8-10 hours while wheat and ragi will take 48 hours to germinate.
  • Wash rice and drain
  • Cover the sprouted grains and rice loosely with a thin cloth and Sun dry separately
  • Once dry, roast the grains till it gives a nice aroma and mix together
  • Cool completely and grind it to a fine powder. I got it done in the flour mill. A powerful mixie would also do the job
  • Store in an airtight container and use for the porridge.
Method of making the porridge here.


Monday, June 9, 2014

Rave Rotti / Semolina Flatbread


People have started asking me now, how I get the time to try many cooking and baking recipes and even blog about them, with an almost 8-month old. Well, I guess if one wants to do something, one figures out a way to! I tell them I get more time now, than when I did with him in my tummy!! Being the footballer he is, he'd kick every food that went into my tummy and I'd throw up almost every meal! Which left me with not much of an appetite to eat or cook! Seems so funny now, to look back... how I hated cooking or anything to do with food, except occasionally enjoying eating out. The interesting meals that D or Amma churned out frequently, tailored to suit my changed taste buds, the super sensitive nose, changed tummy capacity, with reduced spice levels would please me only occasionally... and then there was this question of whether the little fellow inside would decide to not it kick out!! So as a result of all these the blog suffered inactivity too.


And now, with my lil one being fond of watching me cook, right from the time he's 2 months old, I am loving to churn out different things - cooking and baking. He loves to sit in his little chair, earlier in his bouncing chair, watching me talk, and sing and cook or bake. I hand him a light weight, baby safe cutlery or a colorful wrapper or something that keeps him occupied for a few minutes and quickly dish out something. Most of the times, I had not been able to feed the little one what I cook as he was too small, but now, I guess I can start giving him a taste of many of the delicious stuff that i prepare.   


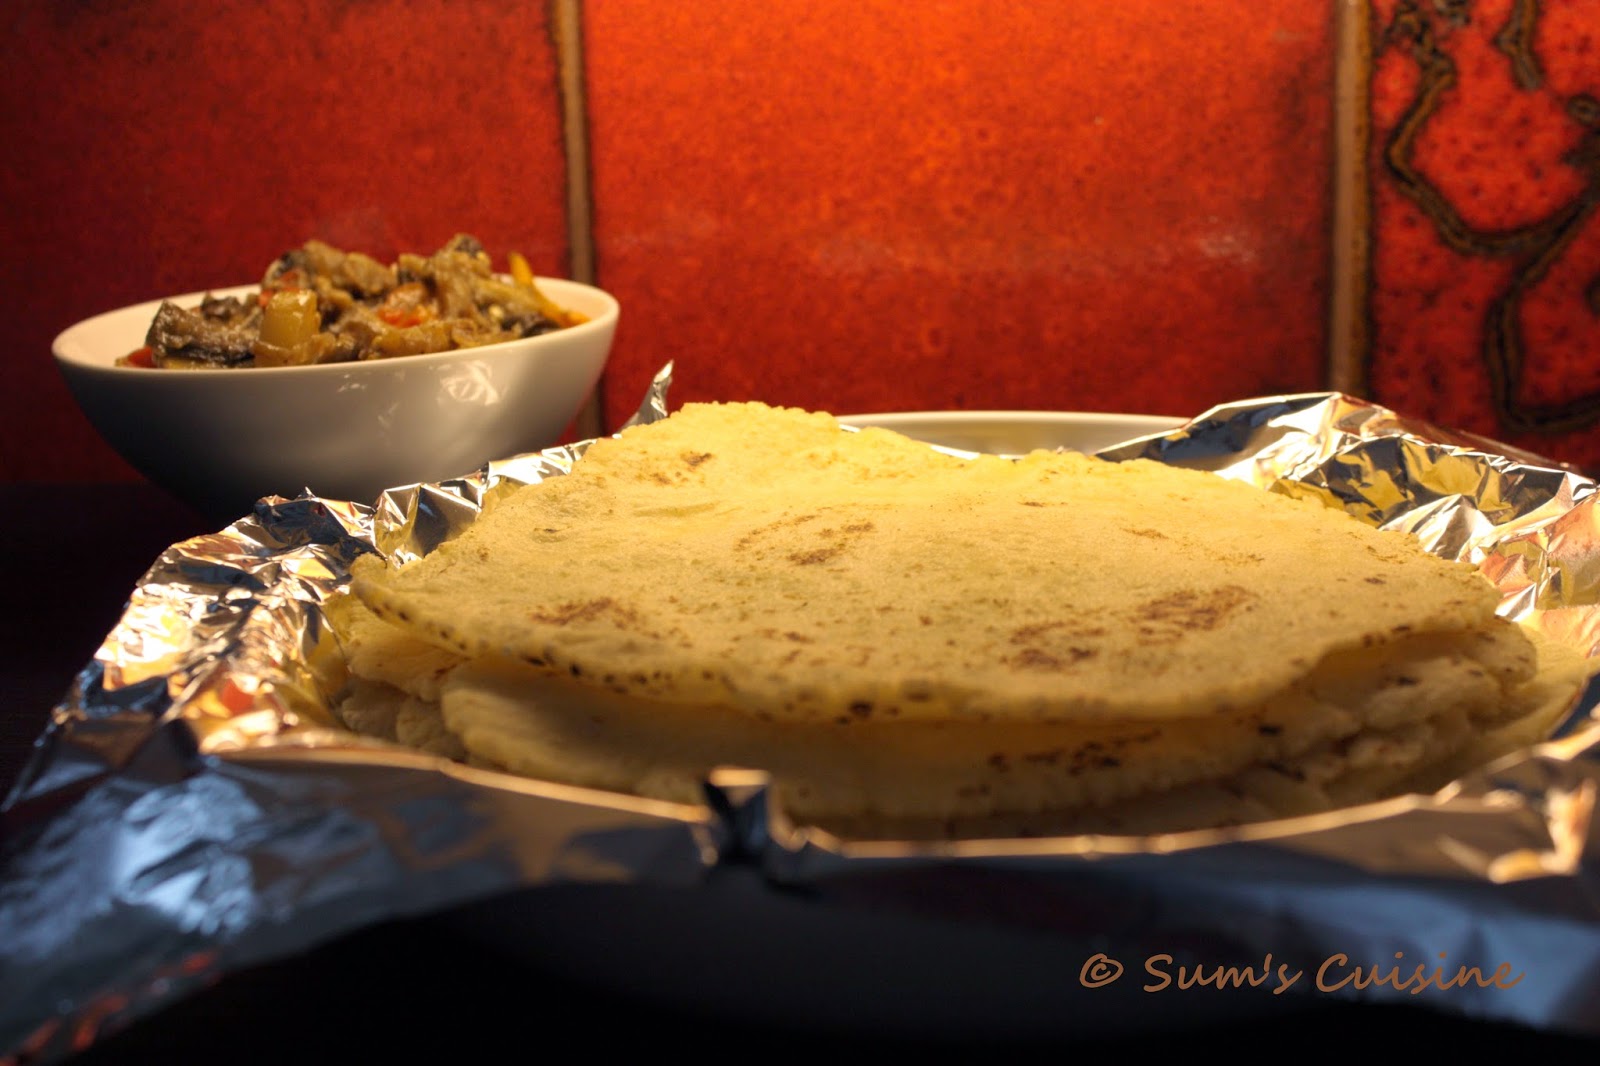
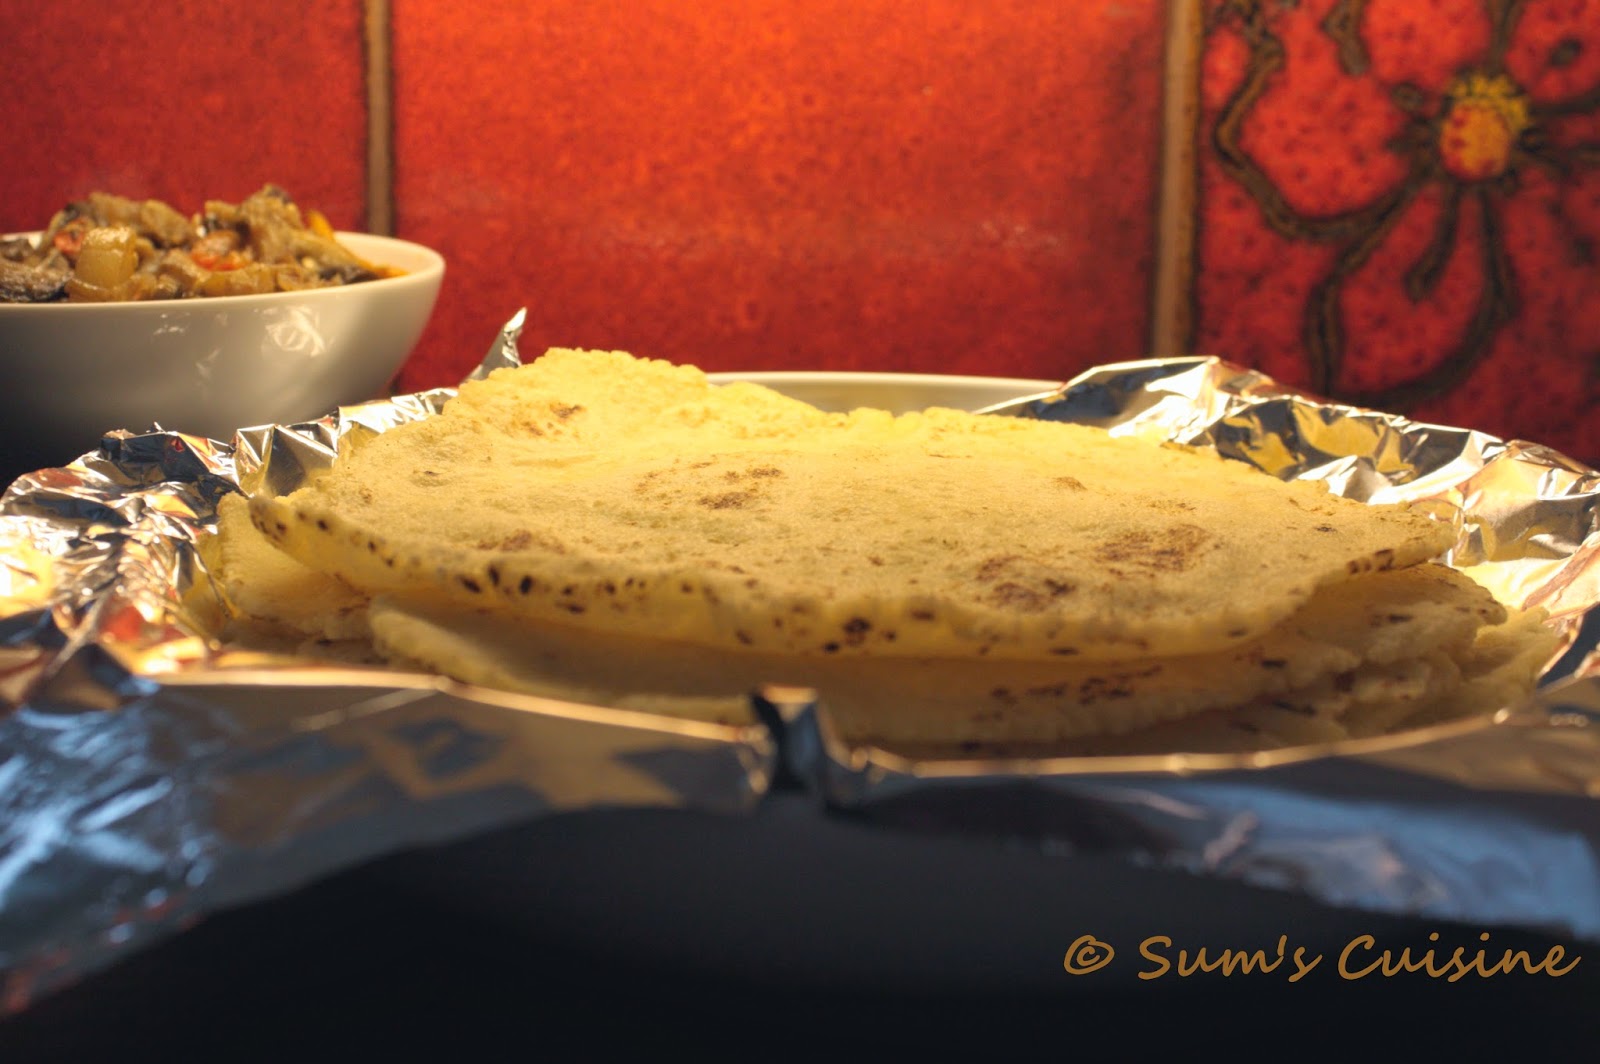
So, coming to the recipe of this post, these are rottis/flatbread made of fine semolina. The semolina is cooked first in water and then, kneaded when still warm and rolled to rotis and cooked on a skillet. It does not require any oil for cooking except for a few drops that are used for kneading the dough. The resulting rotti is soft, almost melt in the mouth, that goes along well with many curries and gravies. It is similar to the Ubbu rotti prepared with rice flour but a bit easier that them for kneading and rolling. 


Well, don't get scared to attempt these reading the steps, it is not very difficult than making normal chapathis/roties... just a step or two more... But the result will be totally worth it.... So here's how we make it....   

Rave Rotti / Sooji Roti / Semolina Flatbread

Preparation time : 15 min 
Cooking time : 5 min for the dough and 2 min for each rotti 
Makes : 10-12

Ingredients:
Fine Semolina (Chiroti rava/sooji) - 2 cups 
Maida / Whole wheat flour - for dusting
Water - 2 cups (This usually works fine but you'll know the exact amount required for your sooji after one trial)
Salt - ½ tsp, or as per taste
Cooking Oil - 2 tsp

Method:
  • In a heavy bottomed pan, boil water by adding salt and a few drops of oil
  • Once water starts boiling, add semolina and let it remain for 4-5 minutes on medium low flame
  • At the end of it, take a strong ladle and continuously stir, avoiding lumps. A wooden one works better
  • Turn off the heat and continue mixing as much as possible. The resulting dough should be similar to that of papad dough - soft, but non sticky
  • Let it cool for a couple of minutes so that it can be handled
  • Divide the dough into 3-4 parts and knead it well, smearing a few drops of oil. See notes below for easier ways.
  • Once the dough is kneaded well into a soft but firm dough, take small lemon sized balls and roll it using rolling pin like a chapatti/roti. Use a little amount of maida or atta for dusting.
  • Heat a griddle on high flame and cook the rolled rotti on both sides by flipping. Ensure not to brown the rotti. Appearance of light brownish spots indicates that it is done.
  • Repeat the same with rest of the dough
  • Serve hot with some palya/gojju/chutney
Notes:
  • To avoid your palms getting burnt while kneading the hot dough, fill it in thick polythene and cover it in a towel / thick cloth and knead it over it. This way a smooth and soft dough will be ready in a jiffy
  • Knead it, make into balls before you start rolling. This saves time and effort, and it gets easier to roll and then cook simultaneously. Or you can roll all of them first and then cook them one after the other. To stack up the rolled rotis make sure you've dusted them well, to prevent sticking to each other 
  • The better you knead, the easier it is to roll. If the dough is not kneaded well, while rolling the rottis start cracking and gets difficult to handle

Monday, May 26, 2014

Baby Food: Vadda Ragi Hittu / Finger Millet Malt


It's amazing how time flies in a rocket speed, especially when it comes to babies. It is as if it were yesterday that I was soooo pregnant, counting days till the due date, and waiting desperately to the little naughty fellow inside, who was making it so difficult for me to eat or sleep! And Adu is now already seven months old! Seven months!! How soon did the time fly off??


But I'm glad I'm living every single moment with him, enjoying all that he does, most of the time. I can sit for hours with him, just admiring this little sweet fellow and feel blessed! May be this is what is called Motherhood!

I started giving him solids after he completed six months, and boy, was he eager to start eating! He used to see us all eat and drink various things, especially when in India, with lot of people around. He had naturally become curious about this 'eating' business! I didn't want to start solids till we travelled back here, and till he completed six months and so poor he, had to wait. He however, had started his eating business with the occasional kheers/payasas that the ajjis specially made dairy free and fed him. He used to devour it, his ajjis would beam in joy, while I would worry he'd reject his baby foods later if he got used to the sweet taste first. He was, however, quite adaptable, even in this case and accepted my salt-less, sugar-less preparations equally well.

Mom prepared two varieties of ragi based malt for him, so that it'd be easy for me back here. Here's the first one, with just ragi / finger millet, sprouted, powdered and sieved with a cloth. Ragi is considered one of the best home made foods for infants in Karnataka, Andhra and Maharashtra. This is a wonderful food for starting on solids for the following reasons:

  • Food quality of finger millet is enhanced by sprouting finger millet.
  • Food prepared from malt is easily digestible
  • By sprouting, salts in finger millet are easily available to the body
  • Water soluble vitamins will increase and the quantity of anti nutrients will decrease
  • Sprouted finger millet possesses maximum energy/calorie and high density nutrients.

Adu loved his first food and was eagerly looking forward to his meal times as long as I gave him only this malt. The pack Amma had sent lasted for about 3 weeks after which I started with 'Ragi Sari', another malt with ragi, and other grains.

Vadda Ragi Hittu / Finger millet Malt

Ingredients:
Ragi - 1 kg (Amma had made with only about half a kilo of ragi, which didn't last long)

Method:
  • Wash cleaned ragi and soak it in water for 24 hours
  • Drain the water in a colander and cover it loosely.
  • Allow it to sprout for one full fay or a little more if the weather is cold.
  • Dry sprouted ragi in shade completely till all the wetness is gone.
  • Roast it in a pan on a low flame till it gives aroma
  • Cool and grind it to fine powder.
  • Sieve it with a fine cloth, discarding the residue (or mix it with any other flours used for adults or add to dosa batter, rather than just wasting it)
  • Store it in an air tight container

Preparing the Malt:

Ingredients:
Ragi malt (Vadda ragi hittu) - 1 tsp
Milk + Water - ¼ cup (See notes)
Ghee or oil – 1 tsp (I use oil as Adu has milk-protein allergy)

Method:
  • In a small saucepan, mix the ragi malt and water (and milk if using)
  • Bring it to a boil, stirring frequently.
  • Once it starts bubbling, take it out from heat, add the ghee/oil and mix.
  • If the consistency feels thick, thin it out in a bit more boiled water
  • Let it cool down to luke warm to feed the baby
Notes:
  • I use water and a spoonful of his milk-free formula powder, as Adu is allergic to cow's milk. Do the same if you do not want to introduce cows milk to your baby under one year.
  • You can also use breast milk in place of milk or formula. In this case, use lesser water and thin it out with BM at the end
  • Adjust the quantity of the malt and the consistency as per your baby's appetite and preference. You'll get a hang in a couple of days.
  • Using one tsp of the powder is just enough for Adu.
  • Salt and sugar are not recommended for babies till one year, so I avoid using both, except on rare occasions, when I add a wee bit.

Tuesday, June 4, 2013

Ridgegourd-Peel Chutney


When it came to cooking, our grand mothers never threw off the peels, seeds and rinds of so many veggies. They probably knew it that these 'wastes' do contain many nutrients and fiber  in some cases more than the actual veggie or fruit and can be put to better use than dumping it into the trash. And so some very good, amazing tasting delicacies were churned out, disguising the main ingredient so well that everyone who ate it would love the taste and not bother to know what has gone inside!


The same was carried over by my mom and MIL as well and thus it continues with me too! The list is endless, with chutneys made from veggie peels/seeds, dosas with rind of watermelon, methi stalks (recipe soon to follow), gojju with jack fruit seeds, and so on. 


One of my favorites till date is the chutney made from ridge-gourd (heerekai) peel. Mom usually made tovve (dal) with the ridge gourd and the peel was used to make chutney, as an accompaniment. That used to be one of my most favorite meals! She used to make sure that the chutney is ground just a few minutes before meal time so that the roasted lentils that went into it were still crisp in the chutney and gave a nice texture when mixed with hot rice with a spoonful of oil or ghee!! What a combination!!


So, next time you are about to throw off the peel, stop and turn it into a nice delicacy! Here's the recipe...

Heerekai sippe / Ridge gourd peel chutney

Preparation time : 5 min
Cooking time : 5 min
Serves : 4 -6

Ingredients:
Heerekai / Ridge gourd peel - from 1 big or 2 small ones - don't peel too much, just the outer ridges would do
Coconut - 1/2 cup, grated
Dry Red chilies - 5-6, depending on taste
Chana dal / Toor dal - 1 Tbsp
Cooking oil - 1 tsp
Tamarind - a small marble sized ball
Coriander and Curry leaves - 1-2 sprigs each
Salt - ½ tsp or as per taste

For Tempering:
Cooking oil - 1 tsp
Curry leaves - A few sprigs
Mustard seeds - 1 tsp
Hing/asafetida - a pinch

Method:
• Roast chana/toor dal, red chilies, curry leaves in a tsp of oil till the lentils change color
• Add the peel to it and continue roasting till the raw smell is gone from the peel
• Let it cool slightly
• Grind the above with all other ingredients, adding a little water. Do not make it into a fine paste - a bit of texture gives a better tasting chutney
• Transfer the ground chutney to a serving bowl
For tempering / tadka:
• Heat the oil in a pan, add mustard and allow to splutter
• Add curry leaves and hing
• Garnish the chutney with tadka

Notes:
• Do not make the chutney too smooth – a little coarse consistency will give a better taste
• Can use chana dal / toor dal or even urad dal or a combination of them
• The chutney tastes good with dosas, rottis too.

Saturday, February 16, 2013

Haalbai - A healthy, irresistible sweet


Hello folks! Here I am after a break... just felt like taking off from blogging, so the absence. I am like that - just don't feel like doing certain things at times!!

Presenting here today is an authentic, South Karnataka sweet - Haalbai, which is almost fat free, healthy, melt in mouth, light and makes you crave for more! It is made of whole grains - wheat, rice or ragi. My favorite is the one with wheat, shown here. It requires soaking the grains and extracting milk from it. The milk extracted is then heated in a heavy bottomed vessel until it thickens to a halwa consistency. Then it is poured over a greased plate and cooled and cut into squares. Some people do use coconut milk also along with the extracted milk, but it is optional. Without the coconut milk, all the fat used is a teaspoon of ghee for greasing the plate!

Coming to the taste, it is a cross between halwa and may be burfi - though not exactly. It can be cut into any shape and retains its shape firmly, but at the same time it is soft with a melt in the mouth texture. It can be had at room temperature or cooled in the refrigerator and had. It's just irresistible!!

I had made these for last Deepavali, by myself, but never got to posting it till now. Let me warn you before hand it is definitely time consuming, but once you are done with it, its totally worth it! You'll be proud of yourself for trying it out!!


Here's how you make it...

Halbai

Preparation Time: ~1 hr
Cooking Time: ~ 1 hr


Ingredients:
  • Whole wheat grains - 1 cup 
  • Freshly grated coconut - 1 cup (optional – I did not use it)
  • Grated jaggery - 2 cup
  • Ghee – 1 tsp 
  • Cardamom powder - 1/2 tsp 
Method:
  • Clean and soak the wheat grains in water overnight or up to 12 hours
  • Grind the soaked wheat grains into a smooth paste using very little water & strain using a fine mesh or a muslin cloth.
  • Repeat the process twice & discard the residue
  • If using coconut, grind it along with the wheat
  • In a large heavy bottomed vessel, add the extracted milk, jaggery, and bring it to a boil
  • Add cardamom powder and bring to a gentle boil.
  • Keep on stirring till the whole mixture thickens. This should take about 45 minutes to an hour.
  • The mixture should leave the sides of the pan. When completely cooked, the mixture is non-sticky & gets a uniform gloss. 
  • Spread on a greased plate & allow it to cool. Once cool, cut into squares & serve
  • It should stay in the refrigerator for about a week.
Notes:
  • This proportion yields about one 10 inch plate of halbai, which can be cut into about 25 pieces
  • Before taking it off the pan, do a test. Take a tsp of the mixture & spread on a greased plate. It should be able to come off without sticking to the plate. This ensures that it is done.

Tuesday, November 13, 2012

Shankar PoLi / Shakkar Para


This is one easy and common sweet that I grew up with. Mom used to make these often for us kids, during festivals, during our holidays, for trips and so on. And most of the times we’d sit with her and help her with it. This is made by mixing a chapathi like dough, rolling it, cutting into diamond shapes and deep frying. 


Our part of the work would be cutting the rolled dough and lifting them off the rolling board… it was fun! And as soon as the fired ones are out of the oil, we’d let it cool a bit and pop them into our mouths, while helping for the next batch!


They are crispy, and the sprinkled sugar adds a nice taste. They do stay fresh for a couple of weeks, that is if we let them stay that long! Works well if you need something to make in a large scale as well.


So here’s Shankar Poli and wishing you all a
Happy Deepavali / Diwali!

Shankar PoLi / Shakkar Para

Ingredients:
All Purpose Flour / Maida - 2 cups
Hot oil / Ghee - 1-2 Tbsp
Sugar - 3 Tbsp
Salt - 1/4 - 1/2 tsp - I’d suggest not to skip this - Salt brings out the other tastes well
Oil for deep frying
Powdered sugar to sprinkle on top (optional)

Method:
  • Mix all the ingredients except the oil kept for deep frying, in a bowl.
  • Prepare a firm and tight dough with using water and keep aside for 10-15 mins
  • Divide the dough into 4 equal portions and roll out each portion by dusting very little flour thicker than a chapathi.
  • Cut the rolled out dough into small diamond shapes using a sharp knife or a pizza cutter.
  • Heat oil in a pan and deep fry the cut out dough in medium heat till golden brown.
  • Drain it on absorbent paper, and sprinkle with some powdered sugar. I used some vanilla sugar that I had.
  • Repeat with the rest of the dough.
  • Allow to cool and store in an air tight container.
  • It stays fresh for a couple of weeks 
Notes:
  • Addition of ghee/hot oil while making the dough gives the snack a crisp texture.
  • Can make a savory version of it too

Tuesday, October 9, 2012

Chatni Pudi - The Authentic South Karnataka Style


Chatni Pudi is a highly essential condiment in any South Indian kitchen. It is like a tomato ketchup in western homes. It can be an awesome side dish to various breakfast items ranging from dosas to idlies to upmas and even pohas. And not to forget its contribution to lunch and dinner - mixing a spoonful of chatni pudi with a generous serving of rice with ghee/oil fills in for any lack of side dish on days. Or just use it as a pickle with some curd rice. And even with enough side dishes, chatni pudi will always have its scope to make it to almost all meals!


There is a different charm and a character in home-made spice powders, if you ask me. Even with the recipe being the same, spice powders of each house will have a signature of that household. The store bought ones do manage to help when there is a time crisis, but homemade is always homemade! And I’ve always been used to homemade powders, be it mom or MIL.

One of the many advantages I had of staying with in-laws was that I never had to bother about Spice powders! Even before I’d notice that one of the many spice powders was running out, it’d be filled up one evening when I returned home! And if at all I was around when MIL was making them, she’d send me out of the kitchen as she felt I was too young and couldn’t take the strong smell and dust of roasting and powdering chilies…


So as expected, when we moved here, our bags were stuffed with jars/packs of various powders - rasam powder, sambhar powder/huLi pudi, menthyada hittu and of course chatni pudi, from both our moms. How long can a jar of tasty, colorful, flavorful chatni pudi last, especially in a foreign land when two foodies are missing our dear Bangalore? Of course it ended sooner than it would back home! And I knew it was something I had to make, at least to overcome the ‘missing-home’ feeling for a while!


So a call to mom and one to MIL, (they both have slightly different process), and how can yours truly not add her own signature to it? Well, the jar is already seeing the bottom, in just about a month’s time since I made it, so that explains it :) Here it is, my version, adapted from both of them and it came out wonderfully well.

Chatni Pudi - The Authentic South Karnataka Style 

Cooking time: 15 min
Preparation time: ~30 min
Makes about 3-4 cups
Lasts for a few months when stored in airtight container, i.e., if you let it last that long!

Ingredients: 
Bengal Gram dal/Chana dal/kadale bele - 1 cup
Black gram dal / Urad dal/ uddina bele - 1 cup
Dry red chilies - about 20; I use a mix of byadagi and guntoor
Curry leaves - 1 bunch with a handful of sprigs
Asafetida - one big generous pinch
Dry coconut - 1 cup; I used desiccated coconut 
Tamarind - a small lime sized ball
Jaggery  - 1-2 tsp, crushed
Salt - ~2 tsp

Tempering:
Oil - 2 Tbsp
Curry leaves - a couple of sprigs
Asafetida - a big pinch
Dry coconut - ½ cup; optional; If using here, reduce the quantity of coconut above

Method:
  • In a large skillet, dry roast chana dal and urad dal separately till it starts changing color and raw smell disappears
  • Transfer to a big platter on one side
  • In the same skillet, roast the red chilies, curry leaves and asafetida till aromatic; transfer to another side of the same platter
  • Next, roast the dry coconut till light golden brown; if using dry coconut, slice it into thick pieces and roast; it will get powdered later
  • Break the tamarind into small pieces and roast it on low flame for a couple of minutes, and transfer
  • Allow all these to cool down for about 15-20 minutes
  • When cool, start grinding the ingredients one by one. Start with the dals and powder them coarsely.
  • Make sure not to make it into fine powder, keeping it a little coarse adds to the texture
  • Transfer to a big bowl
  • Next powder the red chili, curry leaves mixture and transfer to the same bowl
  • Similarly powder the tamarind and salt next, make this as fine as possible so that it gets mixed well
  • Finally mixie the jaggery and coconut together and transfer to the same bowl
  • Now, mix all the ground ingredients with hand in the bowl. The mixture now looks very pale, with a dull color.
  • Taste it and if you feel it needs something, add it now - salt or more jaggery. It should have a balanced taste of all four elements
  • Once done, transfer the mixture again to the mixie jar in parts and run it for a few seconds each, till it is well mixed. This step gives the chatni pudi that awesome attractive color and look
Tempering: optional
  • Heat oil in a small pan, add mustard and allow to splutter
  • Add the asafetida and curry leaves and fry till crisp
  • Add a pinch of turmeric
  • You can add some more grated coconut here, but it is optional
  • Add it to the chatni pudi and give it a good mix
  • Allow it to cool for an hour or so, and then store it in an air tight jar. It stays fresh for a few months
Notes:
  • Using byadagi red chilies gives it a beautiful color and guntoor variety gives heat; we use a combination of both
  • In mom’s version there is no tempering at the end, and full coconut and curry leaves are added while grinding whereas in my MIL’s version, they are added along with tempering as well

Tuesday, September 18, 2012

Modaka, Karigadubu for Ganesha Chaturthi


Gowri-Ganesh festivals are one of the biggest in our households. Preparations at home start more than a week ahead. For Ganesha who apparently is a food lover, there will be varieties and varieties of snacks prepared, mainly deep fried ones. And all these get done for neivedya, for offering to God, which means it is done before even having breakfast, soon after a bath, in fresh clothes, without tasting them. They are prepared and kept away, out of reach till the Ganesha arrives! The house will be smelling heavenly with all the goodies, but yet, everyone knows they won’t get it!

One of the years, when they had a lot of energy my parents had made 21 kinds of goodies for this Elephant God, 21 being his favorite number! And at in-laws’, it is usually a big huge box full of chakli, kodubale, thenkolalu, etc along with of course Kadubu and modaka. And these will be distributed among relatives and friends too...


This is the first year that we are celebrating festivals by ourselves, and kind of missing home and all the festive spirit. To make up for a part of it, we both made some Modaka and Karigadubu and have kept it away on the top shelf… Just waiting for Ganesha tomorrow to have a first taste or rather sight of it, before we indulge in them :)

Wishing you all a very happy Gowri-habba and Ganesha Chaturthi… Enjoy all the goodies you make, and work out a lil more :D

Here is how to make kadubu/modaka…

Ingredients:
For the dough:
1 cup Maida/All purpose flour
¼ cup Chiroti Rava(fine Semolina)
Salt - ¼ tsp
1 tbsp hot Oil / Ghee

For stuffing:
Grated dry Coconut / desiccated coconut - ½ cup
Sugar - ½ cup, powdered
2-3 Cardamoms

Oil,for deep frying
Milk - a couple of tsp, for brushing the edges for sealing

Method:
Dough:
  • Mix maida, rava, salt and oil and add enough water to form a stiff dough. It should be stiffer than the regular chapathi/poori dough
  • Keep covered with a wet cloth for ½ an hour
  • After half an hour, knead the dough well until it becomes soft and pliable
Filling:
  • Peel and rush the cardamom seeds to powder
  • Mix with the grated coconut and sugar
For Kadubu:
  • Make small balls from the dough and roll it out to very thin oval shapes of 4-5" length and about 3” width.
  • Spread about 2 tsp of the filling in the middle, making sure to leave a gap of ½ inch around the edges
  • Dip a finger in the milk and brush the edges
  • Now, fold lengthwise, and seal the edges tightly, by pinching it. Make sure to seal it right, else it opens up and messes the oil while frying
For Modaka:
  • Take smaller balls of the dough and roll it out to thin circles of about 3-4 inches diameter
  • Spread about 1-2 tsp of the filling in the middle, making sure to leave a gap of ½ inch around the edges
  • Dip a finger in the milk and brush the edges
  • Now, bring the edges together, gathering it on top and pinch them together.
Frying:
  • Heat oil in a thick frying pan/ kadai over medium flame.
  • When hot enough, reduce the heat to medium and drop 3-4 at once into the oil and fry them till crisp and golden in color
  • Drain them on a paper napkin.
  • Store in airtight container when cooled. They remain crisp for 4-5 days.
Notes:
  • The dough for the outer layer should be mixed stiff which gives crisp kadubu.
  • Make sure to seal the edges well

Wednesday, August 8, 2012

Nucchinunde - Steamed Lentil Dumplings


Nucchinunde is a traditional Karnataka snack, dumplings of lentils and coconut and steamed and served with coconut chutney. These are quite healthy as they are steamed and filled with proteins from the lentils.

They can be made with toor dal, chana dal or a combination of these. Sometimes moong dal can also be mixed. A bit of coconut is added too, to enhance the taste. Greens like mint, coriander and curry leaves add a nice flavor. Spinach can also be added to add more nutrition.


These can be made in a steamer or in an Idli stand. If you don’t have one, you can even make a temporary fix by boiling water in a big vessel and keeping these in another small container/plate (raised in height by keeping another bowl or so below) and covering with a plate. This time, since I didn’t have proper equipment, I used my bundt pan to steam these dumplings!!

These taste awesome fresh out of the steamer, but can also be reheated and eaten. A dollop of ghee adds to the taste, along with a coconut chutney as accompaniment. They taste good cold too. Can be had as a snack or for breakfast too.

Nucchinunde - Steamed Lentil Dumplings

Preparation time        : 15 min + soaking time of 3-4 hrs
Cooking time               : 15 min
Serves              :  4

Ingredients:
Chana dal - ½ cup
Toor dal - ½ cup
Split Moong dal - 1/2 cup
Green chilies   - 2-3
Coconut           - ½ cup, grated
Salt                  - ¼ tsp or as per taste
Curry leaves    - 2 sprigs
Coriander        - 2 Tbsp, finely chopped
Mint/Dill/Spinach - ½ cup, finely chopped; Optional; I used mint
Oil - just a few drops for greasing the pan

Method:
  • Soak the lentils for 3-4 hours or overnight
  • Drain completely and wash it a couple of times thoroughly. Soaked dals have a strong smell and washing is very important
  • Grind the dals with all other ingredients into a very coarse mixture, in pulse mode. Do not add any water; And do not make it into a fine paste
  • Mix in chopped greens if using
  • The mixture will be wet enough to hold shape when made into dumplings
  • Take TT-ball sized portions of the dough and press it a bit and make into dumplings; usually they are made in cylindrical shapes
  • Arrange the dumplings in the greased container of a steamer and steam it for 10-15 minutes till it is just about dry and cooked.
  • Serve piping hot or warm with a spoonful of ghee and some coconut chutney… Bliss!! 
Notes:
  • Can use only one kind of dal or a combination of any of the three in any proportion; each has a slightly different taste and texture
  • I again stress on not grinding to a fine paste; it makes the dumplings hard
Sending these to Akila's event here.