Wednesday, November 19, 2014

Oats Bisi Bele Bhath


The thing about South Indian cuisine apart from being extremely tasty is that they are mostly full of rice-based dishes. And being more health conscious now, I try to replicate the popular dishes with something healthy. In some cases it is replacing rice with oats or wheat. Here I tried out making Bisi Bele Bhath with oats instead of rice and the results were quite satisfactory.


Bisi bele bhath is a famous rice-based dish Karnataka. Bisi-bele-bhath translates to hot-lentil-rice in the Kannada language. It is also known as Bisi bele huliyanna. The preparation of this dish is quite elaborate, involving preparation of spice powder. The spices used, contribute to the unique flavor and taste of this dish. It is served hot along with boondi or potato chips.


So here's our Oats BBB, in fact simpler to make than the traditional one...

Oats Bisi Bele Bhath

Preparation time : 15 min
Cooking time : 25 min
Serves : 4

Ingredients:
Oats - 1 cup (I used rolled oats)
Tur Dal - 1 ½ cups
Chopped Vegetables (Beans, Carrot, Potato, Onion, peas) - together 2 cups, all chopped into ½” pcs
Salt - 1 tsp
Coconut - 1 ½ Tbsp, grated - fresh or dry
Tamarind pulp - 1 Tbsp, adjust acc to taste
Jaggery - 1 big marble sized ball
Oil - ½ Tbsp
Butter - 1 Tbsp, optional
Turmeric - 1 pinch
Salt - 1 tsp, adjust acc to taste
Bisi Bele Bhath powder – 3 Tbsp (1 §)

For the powder:
Chana dal - 2 tsp
Urad dal - 2 tsp
Dry red chilies - 8-10
Cinnamon - 1” stick
Coriander seeds - 2 tsp
Cloves - 5-6
Maratha Moggu - 2
Cardamon - 2
Poppy seeds - 2 tsp
Curry leaves - 2 sprigs

For tempering:Cooking oil - 1 tbsp
Mustard seeds - 1 tsp
Groundnut seeds - 1 tbsp
Curry leaves - 2-3 strands
Red chilies - 1
Turmeric - 1 pinch

Method:
For BBB powder:
  • Dry roast all the ingredients
  • Allow to cool for 5 minutes
  • Grind them into slightly coarse powder
  • This can be made in larger quantity and preserved for a couple of months
Bisi Bele Bath:
  • Pressure cook dal and vegetables with a pinch of turmeric in sufficient water
  • Add tamarind pulp, salt, jaggery, BBB powder and bring to boil
  • Add oats and continue cooking for 5-6 minutes till the oats are cooked well. Add more water as needed. Oats absorbs more water so make it runnier than you like the bisi bele bhath to be.
  • Add grated coconut and mix thoroughly
  • Turn off the flame and add butter and mix
Tempering:
  • Heat oil in a pan
  • Add mustard seeds and allow to sputter
  • Turn the heat low, add groundnut seeds, and stir
  • After the groundnuts are half-done, add curry leaves and red chili pieces and stir for half a minute till all the ingredients are properly roasted. Keep aside till needed
  • Mix the tempering to the BBB just before serving to retain the crispness of the groundnuts
Notes:
  • Make the BBB a very watery with oats. It absorbs the water and gets thickened after sometime.
  • An onion can be sautéed and added along with the tempering

Monday, October 27, 2014

Cranberry Walnut Bread - From The Bread Bible


Have been visiting the city library quite often these days, especially for little Adu who loves books and also the time he gets to spend at the baby section there, with other kids and truck loads of books. And then after that I get drifted towards the cookery section and get carried away by the wonderful cook and bake books there. Just can't resist myself from picking up a couple of them. And then I come home and sit with the books, adoring and admiring the recipes, the pictures, the author for all the hard work and dream about making a few of them, and note a few... And occasionally I do attempt to make one or two too, after all the drooling! And a couple of times, it so happened that I returned the books without noting the recipes that I tried from them and liked. And return back to the library again, looking for the same book, so as to note down at least the one I tried!


So this time, when I came home with the humongous book 'The Bread Bible' by Rose Levy Beranbaum, I was determined to make a few of them, and to note them down before returning! And so I tried out this recipe, as I was also looking for a recipe to make use of the dried cranberries that I had got and the pack of walnuts lying in the kitchen. The recipe is originally a Raisin Pecan bread, to which the author suggests this variation of cranberries and walnuts.


The bread turned out very nice, with a beautiful texture. The process however was a bit more lengthy than the ones I usually prefer, with the sponge and its resting time taking up extra hours, but then its not a complicated process anyway. Just needs more time, and the end result was a really beautiful loaf. I've simplified it by using a loaf pan, as opposed to shaping a free form loaf and baking on a sheet.

Here's the recipe, shortened from the version in the book...

Cranberry Walnut Bread

Preparation time: 10-15 min
Dough starter: min 1 ½ hrs, max 24 hrs
Minimum Rising time: abt 3 ½ hours
Baking time: 45 – 55 min
Source: Rose Levy Beranbaum's 'The Bread Bible'

Ingredients:
For the Soaked Cranberries
Dried Cranberries – 1 cup
Hot water – 1/3 cup

For the Sponge / Dough Starter
Bread Flour - 1 cup
Instant Yeast – ½ tsp
Water at Room temperature - 1 cup (Incl cranberry soaking water)
Honey / Light Corn syrup – 1 Tbsp

For the flour mixture:
Bread flour – 1 ¼ cup
Whole wheat flour – 1/3 cup
Instant Yeast – ¾ tsp
Walnuts – 2 cups, divided use
Salt – 1 ¼ tsp
Vegetable oil - 1 Tbsp

Method:
  • Soak the Cranberries in the hot water for about 30 min, until soft and plump
  • Drain them and reserve the water in a 1 cup measuring jar
  • Add more water to make this 1 cup water to use in the sponge below
  • Prepare walnuts: Toast the walnuts either on stovetop or in the over at 170deg C for about 7 minutes. Peel off the skin with a clean kitchen towel as much as possible
  • Finely grind ½ cup of this along with whole wheat flour. Chop the other 1 ½ cups into fine pieces and keep aside.
  • Make the Sponge: In a large bowl or mixer bowl, place the ingredients for the starter and whisk for about 2 min until very smooth.
  • Scrape down the sides, cover with a wrap and set aside while making the flour mixture
  • Make the flour mixture: Mix together all the ingredients except the chopped walnuts, oil, salt and a ¼ cup of flour. Spoon the mixture over the sponge lightly and cover tightly and let sit for 1 to 4 hours. The sponge will bubble through the flour mixture.
  • Mix the dough: Add the salt and oil, and mix with a wooden spoon or with hands to bring the dough together. Knead for 5 minutes adding the reserved flour to prevent sticking.
  • Keep covered for about 20 minutes and again knead the dough for 5 minutes till very smooth and elastic.
  • Spread the dough into a rectangle and add the walnuts and soaked cranberries over it and roll it and mix it in to evenly distribute.
  • Let the dough rise until it is double in volume for about 1 ½ hours, placing it in an oiled bowl, covered with a cling wrap.
  • Shape the dough into a 11” long loaf on a floured counter. I simply shaped it into a greased loaf pan and spread it to fill it. Let the dough rise till double again, for about an hour
  • Preheat oven to 220 deg C (400 F) and place a cast iron skillet or a sheet pan in the lowest shelf for water.
  • Bake the bread: Slash the bread with a sharp knife ¼ to ½ inch deep parallel slashes on the top of the dough. Mist the dough with a little water and quickly place it on the oven.
  • Toss ½ cup ice cubes into the tray at the bottom shelf of the oven and close the oven door quickly.
  • Bake for 5 minutes and reduce the oven temperature to 180 deg C (375 F) and continue baking for 40 – 50 min until the top is golden, and a skewer inserted comes out clean or the bread internal temperature reads 190 F (Mine was done in 45 min)
  • Cool the bread on a wire rack for about 2 hours before slicing it with a serrated knife into slices
Notes:
  • This is a variation of the Raisin Pecan bread that Rose suggests in the book
  • I added a mixture of cranberries and raisins.
  • I reduced the cranberries and walnuts by about half a cup thinking it was to much, but then later realised the amounts given by the author were perfect. Mine seemed a little too less in the bread

Friday, July 18, 2014

Chocolate Wafers

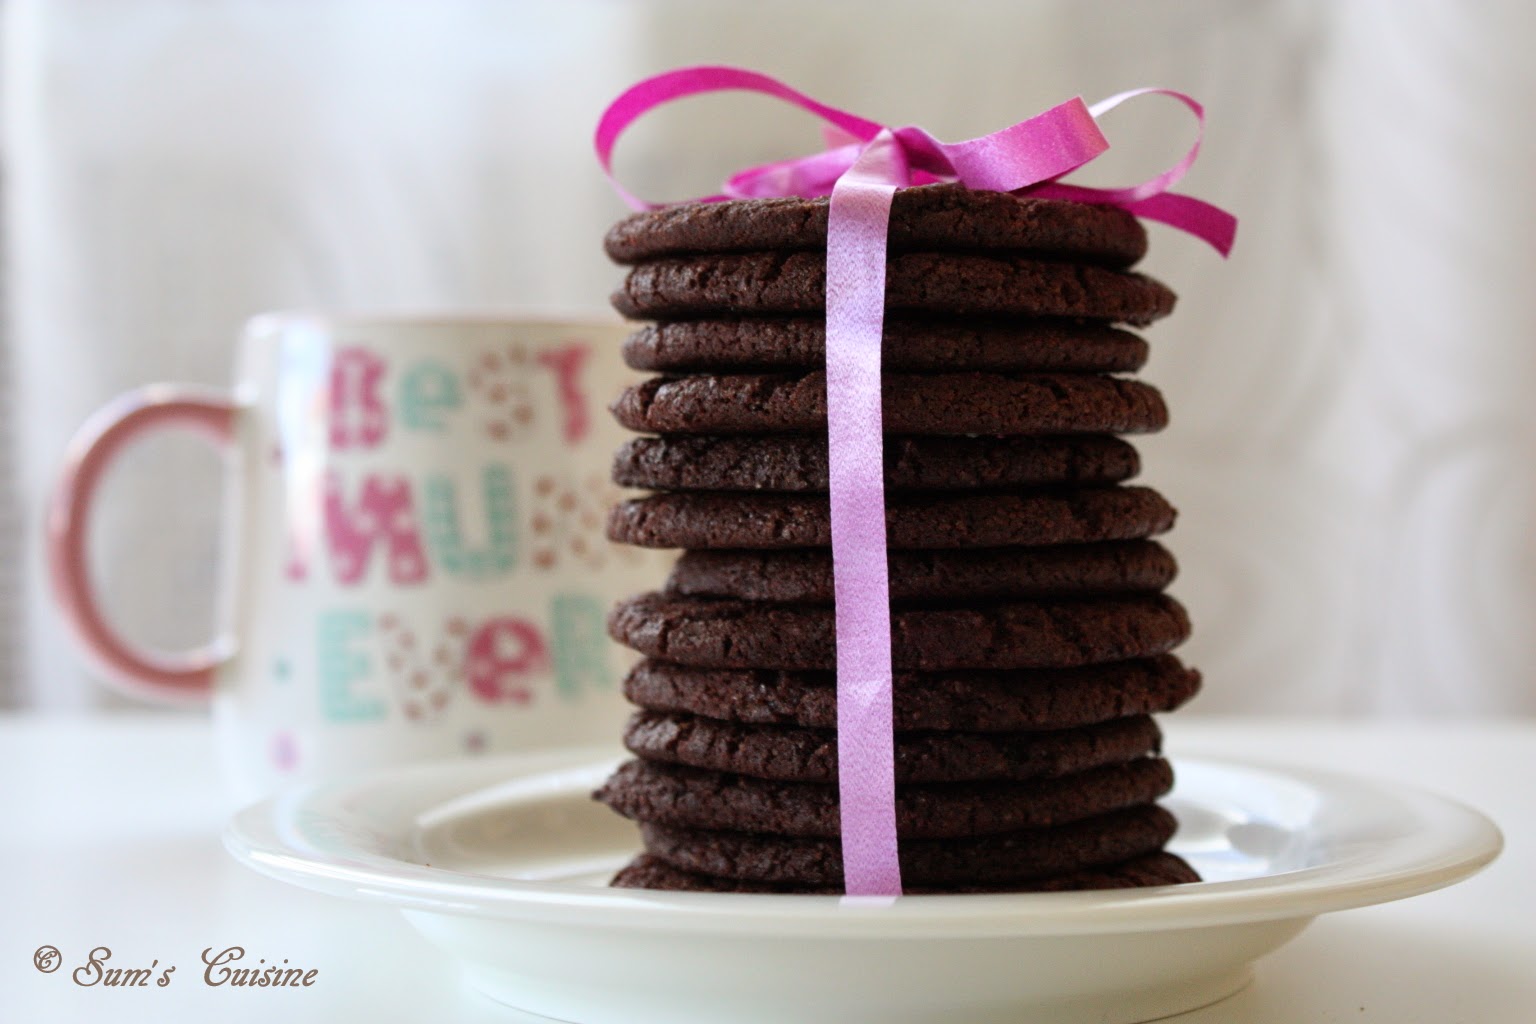
I can never get enough of chocolate! Well, I looove to bake with chocolates and trying out different chocolate based bakes makes me happy! And well, who doesn't like cakes and cookies with chocolates? So it is Chocolate wafers this this around here!


I thought of deferring posting this as my previous post was Wacky Chocolate Cake, but couldn't resist my temptation to share it! The pics of other stuff that I've made and shot are not yet processed and why not post the same, I thought....


Well, these chocolate wafers are really simple to put together. The dough making took hardly 15 minutes of my time and then off it went to the fridge, in the form of logs. The excess can be dumped into the freezer too! It can be pulled out of the refrigerator whenever necessary, cut into slices and baked. And the baking time is also very little – 10 minutes for a batch is nothing, if you ask me, especially what comes out is a batch of drool worthy, chocolaty cookies!


And did I tell you these have very very little fat?? And they stay fresh for about two weeks!! Hope you'll enjoy these as much as we did! Here's the recipe....

Chocolate Wafers


Preparation time: 15 min
Resting time: Overnight
Baking time: 12 min
Makes: 36 - 40 cookies
Source: Joy of Baking

Ingredients:
All Purpose Flour - 1 cup (130 grams)
Unsweetened Cocoa powder - 1/2 cup (50 grams) (regular or Dutch-processed)
Baking soda - 1/4 tsp
Salt - 1/4 tsp
Unsalted Butter - 3 Tbsp (45 grams), room temperature
Margarine - 3 Tbsp (45 grams)
Packed light brown sugar - 2/3 cup (140 grams)
White granulated sugar - 1/2 cup (100 grams)
Pure Vanilla extract - 1 tsp
Egg white - 1 large (30 grams)

Method:
To make the Dough:
  • In a bowl, sift or whisk together the flour, cocoa powder, baking soda, and salt.
  • In the bowl of your electric mixer (or with a hand mixer), beat the butter and margarine until well blended.
  • Add the sugars and vanilla extract and beat on high speed for about one minute. Scrape down the sides of the bowl.
  • Beat in the egg white.
  • Add the flour mixture and beat just until incorporated.
  • Place the dough on your counter and, using your hands, evenly form the dough into a log shape that is about 9 inches (23 cm) long. I made two smaller logs of about 5 inches long
  • Carefully wrap the dough in aluminium foil, parchment paper or wax paper and fold or twist the ends. Try not to flatten the log.
  • Refrigerate until firm. This will take several hours or you can even chill it overnight.
To bake the Cookies:
  • Preheat the oven to 180 deg C (350 degrees F) and place the oven rack in the center of the oven. Line two baking sheets with parchment paper.
  • Using a sharp knife, slice the log into about 1/4 inch (6 mm) thick wafers.
  • Place the wafers on the baking sheet spacing, about 1 inch (2.5 cm) apart.
  • Bake for approximately 10 - 12 minutes or until the the cookies puff and the tops of the cookies have cracks (ripples).
  • Remove from oven and let the cookies cool on the baking sheet for about 5 minutes before removing to a wire rack to cool completely.
  • Can be stored in an airtight container, at room temperature, for about 10 days. They can also be frozen.
Notes:
  • I used 90 g (6 Tbsp) of dairy free margarine only
  • I made two smaller logs and baked them on separate days.
  • Baking for 10 minutes gave slightly chewy cookies and 12 minutes gave crispy ones


Monday, June 30, 2014

Wacky / Crazy Chocolate Cake - Egg-free, Dairy-free, Mess-free!


You will be having a bunch of guests in the next hour and after cooking a meal for them you realize you have not made a dessert! You can fix it by serving the vanilla ice cream stocked up in the freezer, but is that enough? How you curse yourself for not having baked a chocolate cake for the dessert! But the thought of measuring, creaming, mixing, baking just before the guests arrive dreads you. Especially the washing of the numerous measuring, mixing bowls that end up in the sink after a bake. Honestly that is what scares most of us!


For such a situation, who doesn't need some easy breezy, quick and dirty, mess free recipes in one's repository? How much ever you love to bake those elaborate, hi-fi recipes, which require accurate measurements, lengthy instructions on the method, which should be followed very carefully and exactly, I bet you sometimes long for a carefree and easy recipe to bake, something that does not require weighing the ingredients carefully, not needing a mixer to mix with, something that you can dump the ingredients and mix it with a spatula and bake. And what if it is an egg-free, dairy free recipe, making it suitable with almost any kind of crowd? And wait, here comes the ultimate catch - you will not end up washing the dozen utensils after pushing the baking pan into the oven!! All you'll have is a spatula, and may be a measuring cup. Yes, you read that right!!


I came across this recipe somewhere on the net while browsing and it caught my attention for two reasons. One, the simplicity and strange uniqueness of the recipe and two and most importantly, it is egg free and dairy free, making it suitable for my little kiddo to try, as he is allergic to dairy. Wow! Of course he is too small yet to have the cake for himself, and all he got was a taste of it, and the rest of it was polished by you know who :D And of course some taste testers in the hubby's office ;)


So, as i said earlier, the procedure is very simple, and kind of weird, if you ask me! You mix the dry ingredients straight away in the baking pan - yes, baking pan, and make three indentations to pour each wet ingredient in, and pour water all over and mix with a spatula! And bake, voila! Does this not sound weird? Of course it did to me, when I read it, but many sites I looked for said the same, which managed to give me the courage to try it. But I didn't want to risk baking it half an hour before guests arrive, before testing it. So this was a test bake, and quite satisfactory. So the next time, if you come home in a short notice, you know what to expect for the dessert ;)


As for the taste, it is not bad at all. Be sure not to over-bake as it dries out pretty fast. And serve it preferably warm, with a sprinkle of vanilla sugar or a topping and some vanilla ice cream. Trust me, you will not regret for having tried it, and the recipe will get into your repository of quick fix, emergency recipes.

Since I have already tested it for you, you can straight away try this for your guests, without having to test bake it :) here you go.....

Wacky / Crazy Chocolate cake

The sources say this cake came to being during war times when there was a scarcity for ingredients and so on... whatever it is, it is a handy recipe for sure!


Preparation time: 10-15 min
Baking time: 30-35 min
Source: Sweet little bluebird

Ingredients:
All Purpose Flour - 1 ½ cup
Unsweetened Cocoa powder - 3 Tbsp
White granulated sugar - 1 cup
Baking soda - 1 tsp
Salt - 1/4 tsp
White vinegar - 1 tsp
Vegetable oil - 5 Tbsp
Water - 1 cup
Pure Vanilla extract - 1 tsp

Method:
  • Preheat oven to 180 deg C (350 degrees F).
  • Mix first 5 dry ingredients in a greased 8" square baking pan. I used an oval tray.
  • Make 3 depressions in dry ingredients - two small, one larger (see the collage pic below).
  • Pour vinegar in one depression, vanilla in the other and the vegetable oil in third larger depression.   
  • Pour water over all.
  • Mix well until smooth.
  • Bake on middle rack of oven for 35 minutes.
  • Check with toothpick to make sure it comes out clean. Cool.
  • Top with a frosting or just sprinkle some vanilla sugar and serve with an ice cream like I did and enjoy!
Notes:

  • Make sure not to over bake this cake as it turns out drier.
  • Once cool, cover the cake in an airtight container and it stays good for 3-4 days

Monday, June 16, 2014

Baby Food: Ragi Sari - Multi grain Malt


Here comes the next variety of infant malt, again prepared by mom. This is a combination of ragi (finger millet), wheat, rice and green gram. All the grains are sprouted, dried, and then ground. We did not sieve it, as we wanted some texture to remain, making Adu go one step further from very smooth porridge. However it is fine enough to feed a 6 month old.


I introduced this to him after 3 weeks of starting on solids, after the first plain ragi malt was finished. He did take moderately well to this, though not as much as the former one. I realised it was probably because of the weird flavour that green gram added to the malt. I tried by cooking it for longer, and the green gram flavour subsided considerably. He then started enjoying it.


Now, after he is 8 months old, I've been giving him a lot of semi solids and a few soft dosas and other stuff, but this ragi malt also features in his diet quite regularly, which he enjoys. Having a tin of home made malt comes in really handy at times, when the kiddo is bored of other stuff, or you want to mix and match and experiment (More about the experiments later)

So here goes the recipe...

Ragi Sari / Nutritious Multi-grain Malt

Ingredients:
Ragi - 1 kg
Wheat - 200 g
Green gram - 200 g
Rice - 200 g

Method:
  • Soak ragi, wheat and green gram separately for 6 - 8 hours.
  • Drain the grains and tie them separately in a clean muslin cloth for germination.
  • Green gram will germinate in 8-10 hours while wheat and ragi will take 48 hours to germinate.
  • Wash rice and drain
  • Cover the sprouted grains and rice loosely with a thin cloth and Sun dry separately
  • Once dry, roast the grains till it gives a nice aroma and mix together
  • Cool completely and grind it to a fine powder. I got it done in the flour mill. A powerful mixie would also do the job
  • Store in an airtight container and use for the porridge.
Method of making the porridge here.


Monday, June 9, 2014

Rave Rotti / Semolina Flatbread


People have started asking me now, how I get the time to try many cooking and baking recipes and even blog about them, with an almost 8-month old. Well, I guess if one wants to do something, one figures out a way to! I tell them I get more time now, than when I did with him in my tummy!! Being the footballer he is, he'd kick every food that went into my tummy and I'd throw up almost every meal! Which left me with not much of an appetite to eat or cook! Seems so funny now, to look back... how I hated cooking or anything to do with food, except occasionally enjoying eating out. The interesting meals that D or Amma churned out frequently, tailored to suit my changed taste buds, the super sensitive nose, changed tummy capacity, with reduced spice levels would please me only occasionally... and then there was this question of whether the little fellow inside would decide to not it kick out!! So as a result of all these the blog suffered inactivity too.


And now, with my lil one being fond of watching me cook, right from the time he's 2 months old, I am loving to churn out different things - cooking and baking. He loves to sit in his little chair, earlier in his bouncing chair, watching me talk, and sing and cook or bake. I hand him a light weight, baby safe cutlery or a colorful wrapper or something that keeps him occupied for a few minutes and quickly dish out something. Most of the times, I had not been able to feed the little one what I cook as he was too small, but now, I guess I can start giving him a taste of many of the delicious stuff that i prepare.   


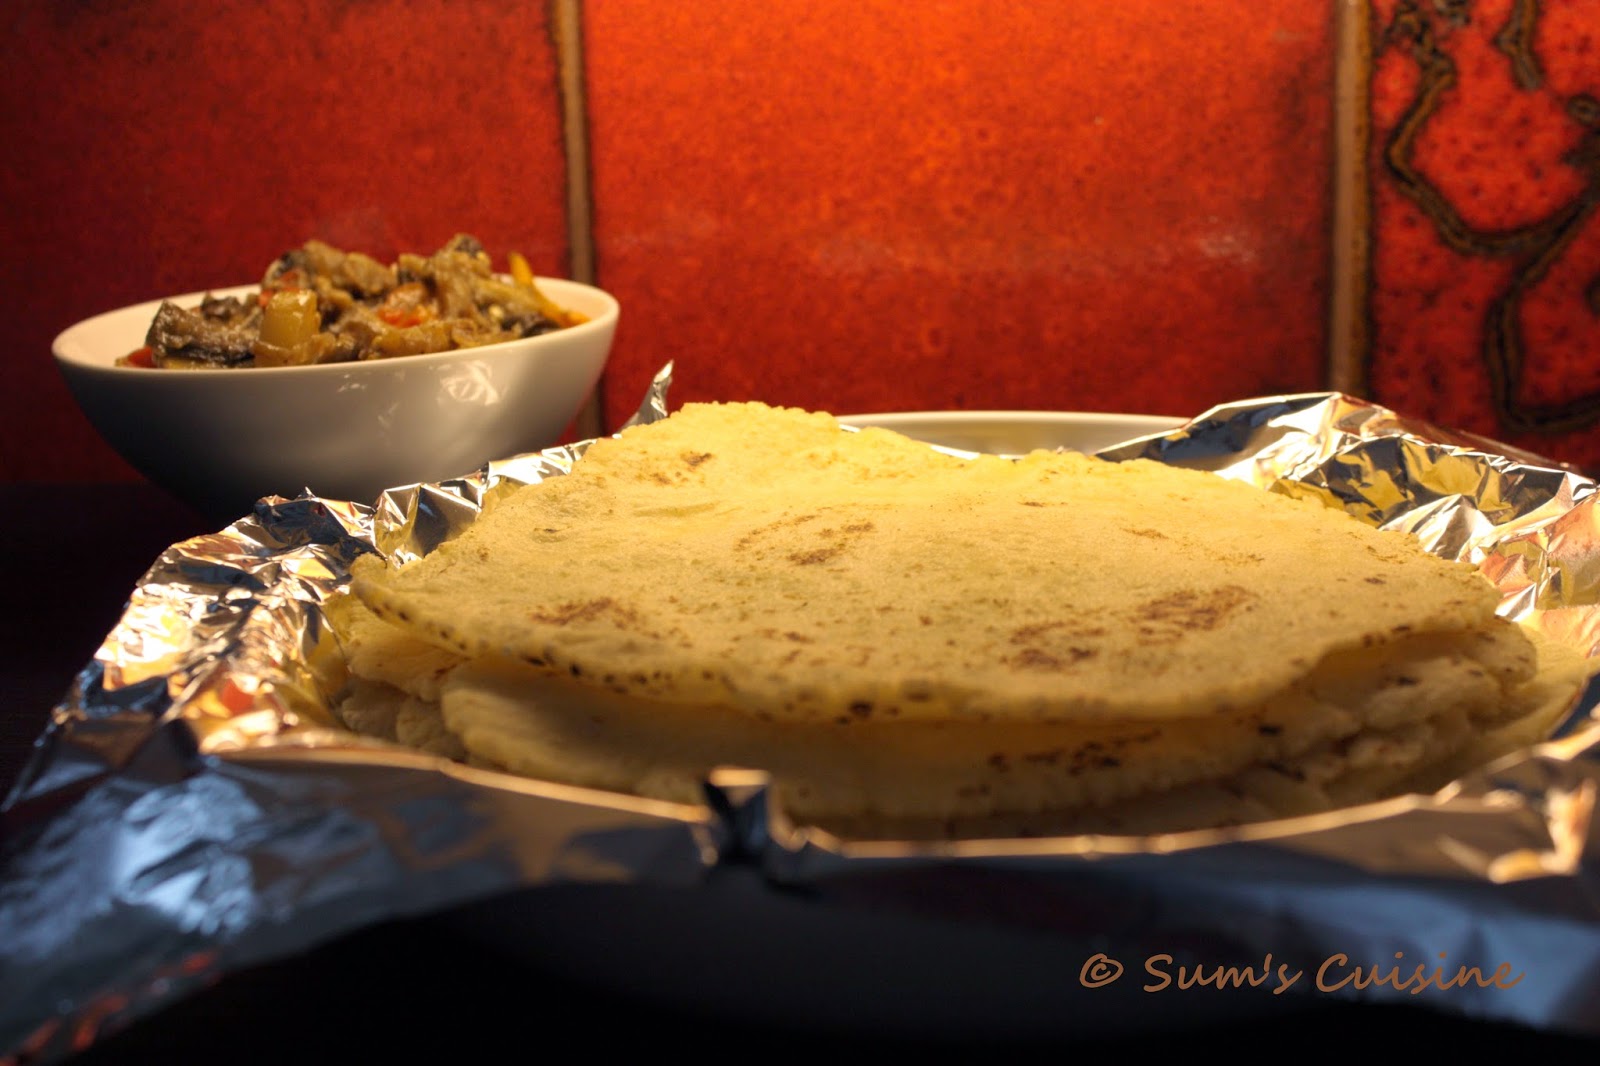
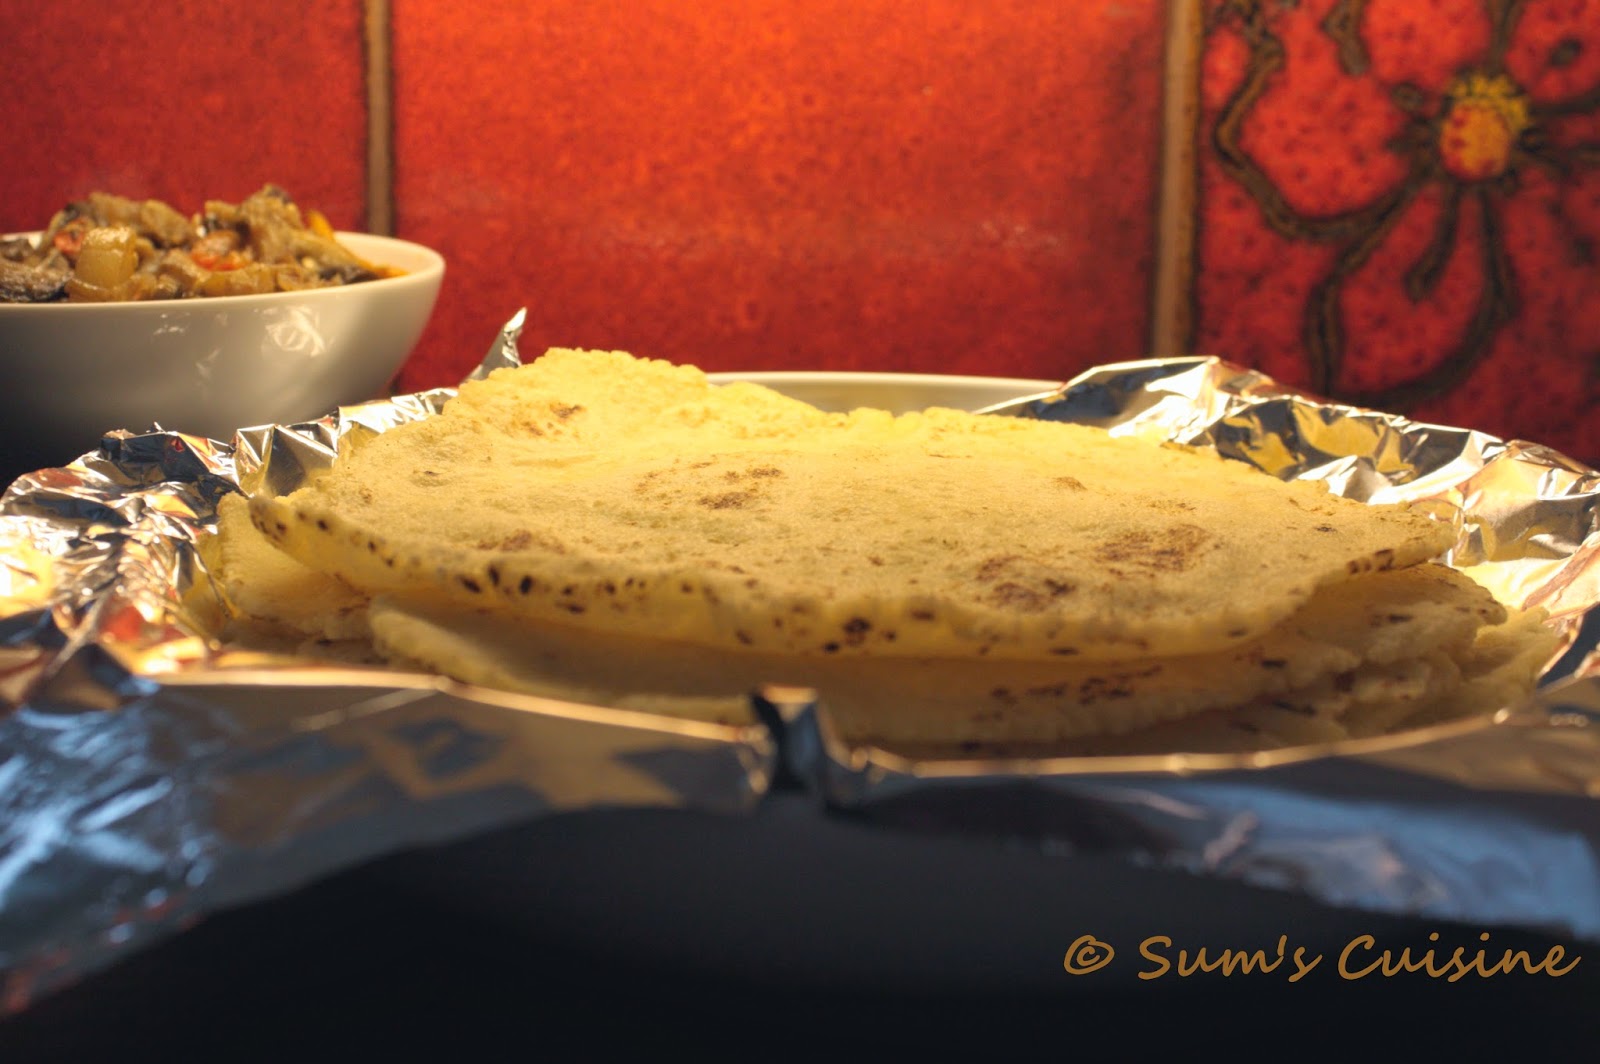
So, coming to the recipe of this post, these are rottis/flatbread made of fine semolina. The semolina is cooked first in water and then, kneaded when still warm and rolled to rotis and cooked on a skillet. It does not require any oil for cooking except for a few drops that are used for kneading the dough. The resulting rotti is soft, almost melt in the mouth, that goes along well with many curries and gravies. It is similar to the Ubbu rotti prepared with rice flour but a bit easier that them for kneading and rolling. 


Well, don't get scared to attempt these reading the steps, it is not very difficult than making normal chapathis/roties... just a step or two more... But the result will be totally worth it.... So here's how we make it....   

Rave Rotti / Sooji Roti / Semolina Flatbread

Preparation time : 15 min 
Cooking time : 5 min for the dough and 2 min for each rotti 
Makes : 10-12

Ingredients:
Fine Semolina (Chiroti rava/sooji) - 2 cups 
Maida / Whole wheat flour - for dusting
Water - 2 cups (This usually works fine but you'll know the exact amount required for your sooji after one trial)
Salt - ½ tsp, or as per taste
Cooking Oil - 2 tsp

Method:
  • In a heavy bottomed pan, boil water by adding salt and a few drops of oil
  • Once water starts boiling, add semolina and let it remain for 4-5 minutes on medium low flame
  • At the end of it, take a strong ladle and continuously stir, avoiding lumps. A wooden one works better
  • Turn off the heat and continue mixing as much as possible. The resulting dough should be similar to that of papad dough - soft, but non sticky
  • Let it cool for a couple of minutes so that it can be handled
  • Divide the dough into 3-4 parts and knead it well, smearing a few drops of oil. See notes below for easier ways.
  • Once the dough is kneaded well into a soft but firm dough, take small lemon sized balls and roll it using rolling pin like a chapatti/roti. Use a little amount of maida or atta for dusting.
  • Heat a griddle on high flame and cook the rolled rotti on both sides by flipping. Ensure not to brown the rotti. Appearance of light brownish spots indicates that it is done.
  • Repeat the same with rest of the dough
  • Serve hot with some palya/gojju/chutney
Notes:
  • To avoid your palms getting burnt while kneading the hot dough, fill it in thick polythene and cover it in a towel / thick cloth and knead it over it. This way a smooth and soft dough will be ready in a jiffy
  • Knead it, make into balls before you start rolling. This saves time and effort, and it gets easier to roll and then cook simultaneously. Or you can roll all of them first and then cook them one after the other. To stack up the rolled rotis make sure you've dusted them well, to prevent sticking to each other 
  • The better you knead, the easier it is to roll. If the dough is not kneaded well, while rolling the rottis start cracking and gets difficult to handle

Monday, May 26, 2014

Baby Food: Vadda Ragi Hittu / Finger Millet Malt


It's amazing how time flies in a rocket speed, especially when it comes to babies. It is as if it were yesterday that I was soooo pregnant, counting days till the due date, and waiting desperately to the little naughty fellow inside, who was making it so difficult for me to eat or sleep! And Adu is now already seven months old! Seven months!! How soon did the time fly off??


But I'm glad I'm living every single moment with him, enjoying all that he does, most of the time. I can sit for hours with him, just admiring this little sweet fellow and feel blessed! May be this is what is called Motherhood!

I started giving him solids after he completed six months, and boy, was he eager to start eating! He used to see us all eat and drink various things, especially when in India, with lot of people around. He had naturally become curious about this 'eating' business! I didn't want to start solids till we travelled back here, and till he completed six months and so poor he, had to wait. He however, had started his eating business with the occasional kheers/payasas that the ajjis specially made dairy free and fed him. He used to devour it, his ajjis would beam in joy, while I would worry he'd reject his baby foods later if he got used to the sweet taste first. He was, however, quite adaptable, even in this case and accepted my salt-less, sugar-less preparations equally well.

Mom prepared two varieties of ragi based malt for him, so that it'd be easy for me back here. Here's the first one, with just ragi / finger millet, sprouted, powdered and sieved with a cloth. Ragi is considered one of the best home made foods for infants in Karnataka, Andhra and Maharashtra. This is a wonderful food for starting on solids for the following reasons:

  • Food quality of finger millet is enhanced by sprouting finger millet.
  • Food prepared from malt is easily digestible
  • By sprouting, salts in finger millet are easily available to the body
  • Water soluble vitamins will increase and the quantity of anti nutrients will decrease
  • Sprouted finger millet possesses maximum energy/calorie and high density nutrients.

Adu loved his first food and was eagerly looking forward to his meal times as long as I gave him only this malt. The pack Amma had sent lasted for about 3 weeks after which I started with 'Ragi Sari', another malt with ragi, and other grains.

Vadda Ragi Hittu / Finger millet Malt

Ingredients:
Ragi - 1 kg (Amma had made with only about half a kilo of ragi, which didn't last long)

Method:
  • Wash cleaned ragi and soak it in water for 24 hours
  • Drain the water in a colander and cover it loosely.
  • Allow it to sprout for one full fay or a little more if the weather is cold.
  • Dry sprouted ragi in shade completely till all the wetness is gone.
  • Roast it in a pan on a low flame till it gives aroma
  • Cool and grind it to fine powder.
  • Sieve it with a fine cloth, discarding the residue (or mix it with any other flours used for adults or add to dosa batter, rather than just wasting it)
  • Store it in an air tight container

Preparing the Malt:

Ingredients:
Ragi malt (Vadda ragi hittu) - 1 tsp
Milk + Water - ¼ cup (See notes)
Ghee or oil – 1 tsp (I use oil as Adu has milk-protein allergy)

Method:
  • In a small saucepan, mix the ragi malt and water (and milk if using)
  • Bring it to a boil, stirring frequently.
  • Once it starts bubbling, take it out from heat, add the ghee/oil and mix.
  • If the consistency feels thick, thin it out in a bit more boiled water
  • Let it cool down to luke warm to feed the baby
Notes:
  • I use water and a spoonful of his milk-free formula powder, as Adu is allergic to cow's milk. Do the same if you do not want to introduce cows milk to your baby under one year.
  • You can also use breast milk in place of milk or formula. In this case, use lesser water and thin it out with BM at the end
  • Adjust the quantity of the malt and the consistency as per your baby's appetite and preference. You'll get a hang in a couple of days.
  • Using one tsp of the powder is just enough for Adu.
  • Salt and sugar are not recommended for babies till one year, so I avoid using both, except on rare occasions, when I add a wee bit.

Thursday, May 15, 2014

Date and Almonds Muffins

Dates are packed with an impressive list of essential nutrients, vitamins, and minerals. Dates are an excellent source of iron, contains 0.90 mg/100 g of fruits. Iron, being a component of hemoglobin inside the red blood cells, determines the oxygen-carrying capacity of the blood. It is highly recommended for vegetarians to counter anemia. 

If you are someone like me, you find dates are a tad too sweet to eat as is. It is with great difficulty that i manage to eat a couple of them, and then get really saturated with it! So, I'd rather like to add them as sweeteners to my milkshakes, smoothies and so on, which will have an added benefit of reducing sugar! And then another nice way to use up these fruits are in bakes... as there would be less guilt for using much less of the bad-sugar and sneaking a good-fruit! 


In this case, it is paired with another ingredient filled with nutrients - almonds. And the almonds, along with giving a nice nutty taste and texture, helps in reducing the amount of fat that goes in. It was a perfect recipe for my baking itch.

It can be baked as a cake, as in the original recipe, but i chose to bake them as muffins/cup cakes. I'd rather call these as muffins than cup cakes owing to the oil used, the mix-n-bake preparation and the final texture. They make a nice snack or breakfast item. 

Date and Almonds Muffins

Preparation time : 15 min
Baking time : 5 min
Adapted from  : Versatile Kitchen

Ingredients:
Almonds - 1 cup (Remove the skin if you want a lighter color, I didn't)
Dates - pitted 15
All purpose flour - 3 cups
Salt - 1 tsp
Baking powder - 2 tsp
Baking Soda - 1 tsp
Cardamom powder - 1 1/2 tsp OR Vanilla - 1 1/2 tsp
Sugar - 1 1/2 cups (I reduced the sugar by a couple of tablespoons)
Vegetable or Canola Oil - 2/3 cup

Method:
  • Soak almond and dates in warm water to cover them for about 4 hours. 
  • Grind into a smooth paste in a mixie/blender. Use enough water so that the resultant liquid/puree is 2 1/4 cups.
  • Preheat the oven to 180 dec C or 350 F. 
  • Grease and line the muffin tray with paper liner cups and set aside. I used silicon cups.
  • In a bowl whisk together flour, sugar, baking powder, baking soda, salt, cardamom powder. 
  • In another bowl whisk together the date and almond puree with oil and vanilla if using. 
  • Dump the dry ingredients to the wet and stir to combine. Do not over mix. 
  • Pour into the prepared cups. Bake for 30 minutes or until a toothpick inserted in the center comes out clean.
  • Cool on the wire rack in the pan for about 10 minutes before turning it on to the wire rack to cool completely. 
  • When completely cool, glaze or just sprinkle with powdered sugar. It tastes good as is, without the additional sugar or glaze.
Notes:
  • I halved the recipe and made 8 cup muffins.
  • If baking in a cake pan, bake for 50-60min.
  • I increased dates by 3-4 and reduced the sugar and it was just fine.

Tuesday, May 6, 2014

Cream cheese Pound cake (cold oven)

Hello folks! The chances are you have forgotten me completely, owing to my absence in the past few months.... The thing is, I was too busy with my sweet creation, that I didn't want to miss out a single moment of his growing up... I did miss blogging though, but then the baby came first!


Well, now he is over 6 months and giving us a wonderful time. He is a co operative baby, touch wood, lets us do our work provided we are around, talking out to him every few minutes. More updates on him here. Let me now get on to today's recipe!

Here's Cream cheese Pound cake, one of the best cakes I've ever baked! it was baked sometime during my pregnancy, in the second trimester, to carry along for a trip we were going. With my pregnancy hormones in full action, throwing up at its peak, food aversion at its maximum, there were very few foods that I craved for, and that I felt like cooking or baking. One of them was this cake and boy, was I glad I baked it! I just loooooved it! I've had it for breakfast, and lunch and as snack on a couple of days during that trip!


Well, it makes a pretty big cake and keeps well, fresh for at least 3 days. It has such a wonderful taste and a good crumb texture.It is a cold oven cake, meaning the oven is not preheated before placing the batter. We both loved loved having it and finishing off the huge cake in just a couple of days! The calories, you say? Of course, I was pregnant with just a handful of cravings, and we were on a trip to a nature reserve, which involved a LOT of walking and walking!


Now, here's the recipe...

Creamcheese Pound cake (Cold oven)

Preparation time: 15 min 
Baking time: 60 - 65 minutes 

Ingredients:
Cake flour - 1 1/2 cups (See notes)
Baking Powder - 3/4 tsp
Salt - 1/2 tsp
Sugar - 1 1/4 cups
Cream cheese - 4 oz (at room temperature)
Butter - 1/2 cup softened
Vanilla - 1 Tbsp
Eggs - 3 large (at room temperature)

Method: 
  • Grease and flour a large loaf pan. I used a ring mould that I had recently bought
  • In a bowl, whisk together flour, salt, baking powder. Set aside. 
  • Cream butter, cream cheese and sugar till fluffy about 3 minutes scraping the bottom couple of times. 
  • Add eggs one at a time and continue beating. 
  • Add vanilla and beat. 
  • Running the mixer on low speed, add half of the dry ingredients. 
  • When it has incorporated, add the remaining and mix it all well. 
  • Pour into the prepared pan. 
  • Place it in the middle rack of the oven and turn it on to 170 C or 325 F. 
  • Bake for 60 - 65 minutes or until golden and a toothpick inserted in the center comes out clean. Mine was done in 60 min.
  • Cool on the rack in the pan for 15 minutes and then turn it on to the wire rack to cool completely. 
  • Slice after it has completely cooled and you get awesomely neat slices!
Notes:
  • To make 1 1/2 cups cake flour, take 1 1/2 cups of all purpose flour in a big bowl. Remove 3 Tbsp of the flour from the bowl and add 3 Tbsp of corn starch. Sift very well, 3-4 times.
  • The cake can be doubled and baked in a 12 cup bundt pan, says Champa. In that case, the baking time would be about 80 min. 

Monday, November 4, 2013

New kid on the blog!

Hello folks!!

Here's introducing the new kid on the blog - my sweet lil baby boy, born on 13th Oct.


This creation of ours has been taking over all the other creations i was supposed to update the blog with! And guess it will continue for some more time... till then, please be patient with me. I do promise to come back with a lot of exciting stuff to cook and bake.

Till then, Cheers!!
Sum :)

Tuesday, July 16, 2013

Veggie Thai Red Curry


This Thai curry has been a recent favorite at my place. We both are loving this, made quite often, with varying veggies, mushrooms, tofu etc. Thai cuisine is a close cousin of Indian cousin, with many spices used in common. Also use of coconut milk makes it especially closer to the South Indian cuisine. Eaten with sticky Jasmine rice or any other cooked ice, it makes a wholesome meal.

However, the combination of spices along with some not used in Indian curried and the method of cooking makes it quite different in taste from Indian curries. Most of the Thai curries are generally not vegetarian. And even the veggie ones often contain fish sauce, shrimp paste, making me hesitant to try one at restaurants.


So searching for recipes and experimenting on combinations, this is the one I have come up with and have stuck with it for quite sometime. We're happy with the taste of this customized, vegetarian home made Thai red curry. Here it is....

Veggie Thai Red Curry

Ingredients:
Coconut milk - 1 can
Bell pepper / capsicum - Chopped, 1 cup, a mix of red, green, yellow
French beans - a handful (optional)
Sugar snap peas - a handful
Baby corn - a handful
Firm Tofu - 200g, washed and drained, chopped into bite sized pieces
Eggplant - chopped (optional - i don't use it as i don't like it)
Carrot - 1, chopped (my addition)
Mushrooms - 1/2 cup, halved
Thai basil leaves - a handful
Soy sauce - 1 Tbsp
Sesame / any other oil - 2 Tbsp
Salt to taste - abt 1 tsp
Red curry paste

Red curry paste:
Dry red chilies - 3-4 (vary according to your spice tolerance)
Cumin- 1/2 tsp
Coriander seeds - 1/2 tsp
Cinnamon - 1/2 inch stick
Kafir lime leaves / bay leaves - 1-2
Fresh coriander leaves/stalks - chopped, a fistful
Brown sugar - 1/2 to 1 Tbsp
Fresh lemongrass - 2-3 Tbsp. minced
Shallots / red onion - 1/4 cup, sliced
Garlic - 2-3 cloves
Galangal / ginger 1 inch piece, grated
Black Pepper - 1/2 tsp
Lime / lemon zest - 1/2 tsp
Tomato ketchup / tomato puree - 2 Tbsp (optional)
Fresh lime juice - 2 Tbsp

Method:
For the paste:

  • Boil 1/4 cup water and turn off the heat. To this, add the dry red chilies and let them sit for 5-10 min.
  • After it is cool enough to handle, grind the soaked chilies with the rest of the ingredients for curry paste into a smooth mixture.
  • This is the Thai red curry paste. This can be made ahead the previous day and stored in the refrigerator.

For the curry:

  • Heat a heavy bottomed pan and add half the oil.
  • Optionally marinate the tofu pieces in some soy sauce, salt and pepper powder
  • Shallow fry the tofu in this till the raw smell is gone, sprinkle some salt if not marinated and keep aside. 
  • In the same pan, add the remaining oil and fry the red curry paste prepared, on low flame
  • Once the oil starts separating from the mixture, add the coconut milk, salt and bring to a boil
  • Meanwhile add the chopped vegetables, mushrooms and let cook in the coconut milk curry
  • Mix in the fried tofu as well and boil for a few minutes
  • Add soy sauce and basil leaves
  • Make sure the veggies are still crunchy and just cooked. Overcooking makes the veggies soggy.
  • Serve hot with some piping hot jasmine rice and enjoy!

Notes:

  • Some of the ingredients mentioned in the list may not be easily available in an Indian kitchen - like galangal, kafir lime etc. These I usually substitute with the mentioned alternative ingredients like normal ginger, bay leaves, etc. I don't see much of a difference.
  • I add vegetables of my choice to this curry usually and do not always stick to the original Thai veggies.


Wednesday, June 26, 2013

Coffee Walnut Cookies


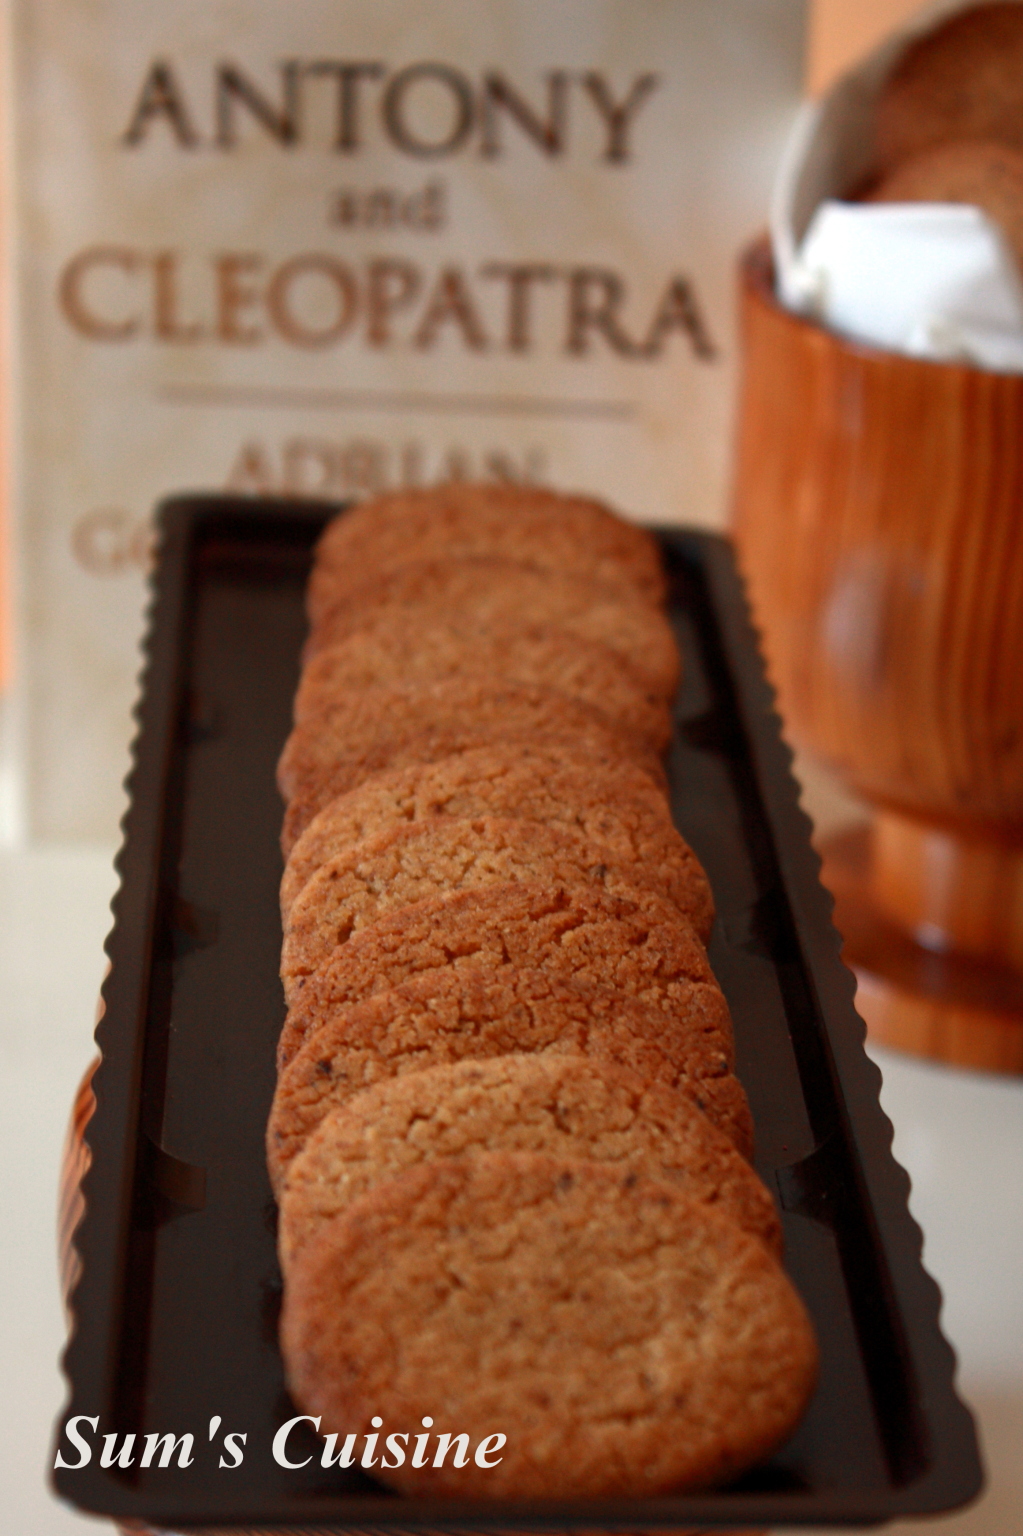
The first time I made these cookies was late one Saturday night when we were watching movie after movie and I suddenly felt like munching something! Went into the kitchen during a couple of commercial breaks and Ta-Da! It was ready! Had used the food processor then and it was such a breeze to bake them! And well, the batch I baked that night got over even quicker ;) But i did have more of the cookie dough saved up in the fridge, which I baked again a couple more times and they didn't last long enough either, to take some decent pics!

Being coffee lovers that we are, we literally fell in love with these cookies. But then the amount of butter that goes into it restrained me from making them quite often :). But then it is Okay to indulge once in a while, right? Some solace is that it is also loaded with healthy fat from walnuts. So made another batch of these recently and made sure we get some pics this time!

I had bookmarked this recipe from Suma's Cakes and More, which is originally from Alice Medrich's Pure Dessert. It is a breeze if making in a food processor; making it by hand is not very tedious either. And the best part is the dough can be stored in the fridge as logs for a few days and when needed, all the work needed to be done is pull out one log, cut it into discs and bake! 


Since it makes quite a huge batch, this is a blessing, rather than having to make all the cookies at once, and rolling them on palms! I chose to make rather small cookies and got about 25-30 cookies from each log and there were 5 logs! Shared them with friends also, after devouring them enough. The cookies also stay fresh for quite a long time - about a month in an airtight container, that is if you can resist it that long! 

Coffee Walnut Cookies

Preparation time: 15 min (if using food processor; slightly more if making by hand)
Baking time: 10 - 17 minutes (See below for details)
Makes: ~100 small cookies / 50-60 medium ones

Ingredients:
All Purpose Flour – 2 cups 
Walnuts – 1 cup (roughly chopped)
Sugar – 3/4 cups
Salt – 1/4 tsp 
Unsalted butter – 3/4 cup ( 170 grams) / chilled and roughly cut up (I reduced it by 2-3 Tbsp and added some milk instead)
Milk- 1.5 Tbsp (Added this to replace part of butter; not needed if using the entire amount of butter)
Instant coffee- 3 teaspoons (Divided use, original recipe has fresh ground coffee beans)
Coffee Essence – 1 tsp (skipped this)
Vanilla Essence - 1 teaspoon
Coffee beans –  to put on top (I didn't use this)

Method: 
  • Put the walnuts, flour, sugar and salt if using, in the bowl of a food processor and pulse till the walnuts are finely ground. (If not using food processor, do this step in batches in a mixie jar.)
  • Pulse again with 2 teaspoons of coffee till well blended. (If not using the food processor, continue with a hand mixer or even by hand in a large bowl). 
  • Add chilled butter and pulse again till breadcrumb like mixture forms (or mix with a large fork)
  • Add the coffee extract and vanilla essence; pulse just until the dough begins to form lumps around the blade. (Mix the dough together either by hand mixer or even by hand till it roughly comes together.)
  • Take out the mixture; pull together to form a dough; add milk if you feel there is a need for binding; knead briefly to make it smooth. 
  • Roll into logs (I made 5 small round logs) wrap in cling wrap and chill for at least 2 hours or overnight.

To bake the cookies:
  • Pre-heat oven to 180 degrees C / 375 degrees F.
  • Take logs out, slice 1/4″ apart. I made them thinner as I wanted smaller cookies. If slicing as 1/4 inch, they spread out more too.
  • Push a coffee bean firmly in the center of each cookie, if using. 
  • Roll the edges of a few in the remaining coffee if you wish. 
  • If the cookies do not get a good round shape when sliced, just shape it holding it gently but firmly against your palm.
  • Place the cookies slightly apart on ungreased pan and bake.
  • If making small cookies or using milk in place of butter, they get done in 9-10 minutes. If making larger cookies or using the entire butter, they take about 15 to 17 minutes.
  • The edges will be slightly starting to brown, and the cookies will still be soft when done. They get crisp once they cool.
  • Cool completely and store in air tight container or just finish off a batch... nothing like warm cookies just out of the oven ;)

Notes:
  • The first time I used a food processor and the next time made the dough by hand. If making by hand, make sure you mix pretty fast before the butter starts to melt due to your body temperature.
  • Replacing part butter with milk didn't change the taste much.
  • I baked the 5 logs in 3 batches, just when needed - they stayed in fridge for 3-4 days and were fine.


Monday, June 17, 2013

Banana Split Icecream


I've become so lazy to clean the house these Days, I'm surprised at myself! But have been doing other things - things that I love, so some consolation! Well, i have Always hated cleaning, though i like the house to be clean :D
 
And this poem i came across on FB a few Days perfectly describes me! And I seem to have taken it quite too seriously that the house was in a big mess. And I had to clean it lest we had to run away elsewhere!!
 
And so started the boring task of cleaning.... and after a couple of minutes I was hungry! Yeah... Another excuse, you say? Huh.... My Eyes went to the lone banana lying on the table and just as i was about to grab it and eat, my head started dreaming of a banana split icecream! Ahhh... I wanted it NOW!
 
But then i exercised some restraint to wait till i finished the cleaning before indulging in a plateful of sinful icecream. And it really worked! I finished the cleaning in the shortest possible time, took a shower in just a couple of minutes and ran to the kitchen to fix up that plate! Ahhh... miss the Corner House in namma Bengaluru.... This is no recipe as such, but a wonderful way to indulge!
 
 
In its classic form it is served in a long dish called a boat. A banana is cut in half lengthwise (hence the split) and laid in the dish. There are many variations, but the classic banana split is made with scoops of vanilla, chocolate and strawberry ice cream served in a row between the split banana. Pineapple topping is spooned over the strawberry ice cream, chocolate syrup over the vanilla, and strawberry topping over the chocolate. It is garnished with crushed nuts, whipped cream, and maraschino cherries [Wiki]
 
This is no recipe as such, but a wonderful way to indulge! Feel free to pair up any flavor of icecream that you like and any topping you fancy... and enjoy!

Banana Split

Ingredients:
(For one serving - Scale up as you wish)
One long banana
Scoops of ice Creams - Vanilla, Chocolate, Strawberry - I used Chocolate bits, Strawberry and vanilla
Toppings - Chocolate sauce, Strawberry sauce (I didn't have patience to make a chocolate sauce, so used nutella instead!)
Pineapple pieces - a few - i used mango instead
Chopped toasted nuts - Walnuts, cashews, peanuts if you fancy

Method:
  • Split the banana into two, lengthwise and Place on a serving platter
  • Scoop out one scoop of each icecream
  • Top it with one of the toppings on each of the icecream scoop
  • Sprinkle with the chopped nuts
  • Wait no longer to indulge!! Enjoy!!


Thursday, June 13, 2013

Basil Tawa Pulav


Another quick recipe from D for a weekend lunch... He is so resourceful in the kitchen that i can't stop admiring! What do you do when the kadai/pan is needed for cooking lunch but it is in the sink unwashed after the breakfast? Of course wash it and use it, right? In case of D, he uses the tawa instead :D And churns out an even better tasting tawa-pulav!


And what do you do when you feel like having a pudina peas pulav, but there is no pudina in the kitchen? Postpone it till you get pudina? Nope! Use the basil that is lying in the fridge instead... that will turn into an all new dish - Basil pulav.
And combine the two together, you have this flavorful, quick and easy Basil tawa-pulav!


This one is from the archives, from the last summer but i'm posting it now that again inspired by the raining of fresh basil in the veggie markets.


Here's the recipe...

Basil Tawa-Pulav

Preparation time: 15 min 
Cooking time: 15 min
Serves: 3-4
Source: D's experiment

Ingredients:
Fresh Basil       - 1 small bunch, cleaned and chopped
Green Peas       - 3/4 - 1 cup
Cooked Rice    - 3 cups (preferably Basmati)
Cooking oil      - 1 Tbsp; Used olive oil
Cumin seeds    - 1 tsp
Cinnamon        - 1” stick, broken into 4-5 pcs
Cloves              - 4-5
Ginger             - 1" cube, grated/ chopped fine
Garlic - 1-2 cloves, chopped fine
Green chilies   - 2-3, adjust according to taste
Black pepper powder - 1/2 tsp, adjust according to taste
Salt                  - ~3/4 tsp or as per taste

Method:
  • Heat oil in a pan.. err tawa :) and add cumin seeds, cinnamon, cloves
  • After half a minute, add grated ginger, garlic, slit green chilies and peas. Sauté for 1-2 minutes
  • Add chopped basil and sauté till just the rawness disappears
  • Sprinkle some salt, pepper powder and mix
  • Mix in the cooked rice thoroughly, add more salt if required and fry the rice for a few minutes on the hot tawa
  • Serve hot, optionally with any raita
Notes:
  • Make the rice with a little less water so that the grains are separate
  • Can add onions as well